Complete The Cloud Resume Challenge
- Part 1: Get AWS Certified and complete The Cloud Resume Challenge
- Part 2: HTML - Create a website
- Part 3: CSS - Style your website
- Part 4: Static Website - Amazon S3
- Part 5: HTTPS - Set up Amazon CloudFront
- Part 6: DNS - Custom domain name with Amazon Route 53
- Part 7-12: Backend - Creating a serverless API and requesting it with JS
- –> Part 13-16: CI/CD - Commit, Build and Deploy with AWS CodePipeline <–
tl;dr: Creating a CI/CD pipeline for the frontend and the backend. Automating the deployment with AWS CodePipeline using GitHub as the source repository.
The final part of this series
This is the final part of my series on how to complete The Cloud Resume Challenge. I have squashed the last steps into this one post since they all kinda overlap.
Git
I mentioned that I would be using Git in the first post of this series, but forgot to ever talk about it. My bad.. But now it is finally time, since we need it to set up a pipeline to automate our continuously integration and deployment
What is Git?
Git is a version control system that allows you to track changes in your code. It is widely used for collaborative software development and helps to manage code.
Initiate a project with Git
So if you haven’t already, let’s set up version control for our project. You will need to have Git installed and have a GitHub account.
When this is done, let’s initiate a Git repository in our project folder. Let’s start with the backend and save the frontend for last since it is the least complex part.
First we open up a browser and navigate to our GitHub account. Here we will create a new repository for our backend. I’ll name it crc-backend, but feel free to name it whatever you want.
Here we will find the instructions for how to create a new repository on the command line. In our terminal, we’ll navigate to the backend project folder and run the following commands:
echo "# crc-backend" >> README.md
git init
git add README.md
git commit -m "first commit"
git branch -M main
git remote add origin git@github.com:<user-name>/<project-name>.git
git push -u origin main
If you refresh your browser, you should now see the new repository with the README file we just created.
Now before we push the rest of our code, we need to add a .gitignore file to our project. touch .gitignore.
This file tells Git which files and directories to ignore when committing changes.
For our backend, we can add the following content to the .gitignore file:
# Terraform
*.tfstate
*.tfstate.*
.crash
.terraform/
.terraform.lock.hcl

# Python
__pycache__/
*.pyc
*.pyo
*.pyd
.Python
env/
venv/
ENV/
env.bak/
venv.bak/

# Lambda build artifacts
*.zip

# OS / Editor files
.DS_Store
Thumbs.db
*.swp
Let’s to a quick git statusto see what files are being tracked by Git. Great, none of the files that we wanted to ignore are being tracked.
Now we can add the rest of our code to the repository and push it to GitHub:
git add .
git commit -m "terraform and lambda code"
git push
Ok, version control is set up for our backend. Now let’s do the same for our frontend before we move on to the CI/CD part. You’ll be able to do this on your own, I believe in you!
CI/CD
CI/CD is explained everywhere, so I won’t say much more than it is short for Continuous Integration and Continuous Delivery/Deployment.
For us that means that when we make a change to our our version controlled source code, it should trigger a pipeline that can do whatever we want. And what we want is to deploy our update to our website.
For our backend we can also test our code in the pipeline to make sure it
actually works before deploying it.
This way we don’t need to manually go into S3 and upload the HTML files. And if we break our backend code, we won’t deploy it to production.
Ok, this sounds great. Let’s go!
Setting up a CI/CD pipeline with AWS CodePipeline
Just like we created two GitHub repositories, we will need to create two pipelines. One for our backend and one for the frontend. Again I suggest starting with the backend, since this will be the most complex pipeline.
Pipeline for our backend
Before we set up our pipeline, we first need to migrate our terraform state to AWS S3. I have written a blog post on how to do this. So if you’re not sure how to, just follow what guide, and come back here when the state is migrated.
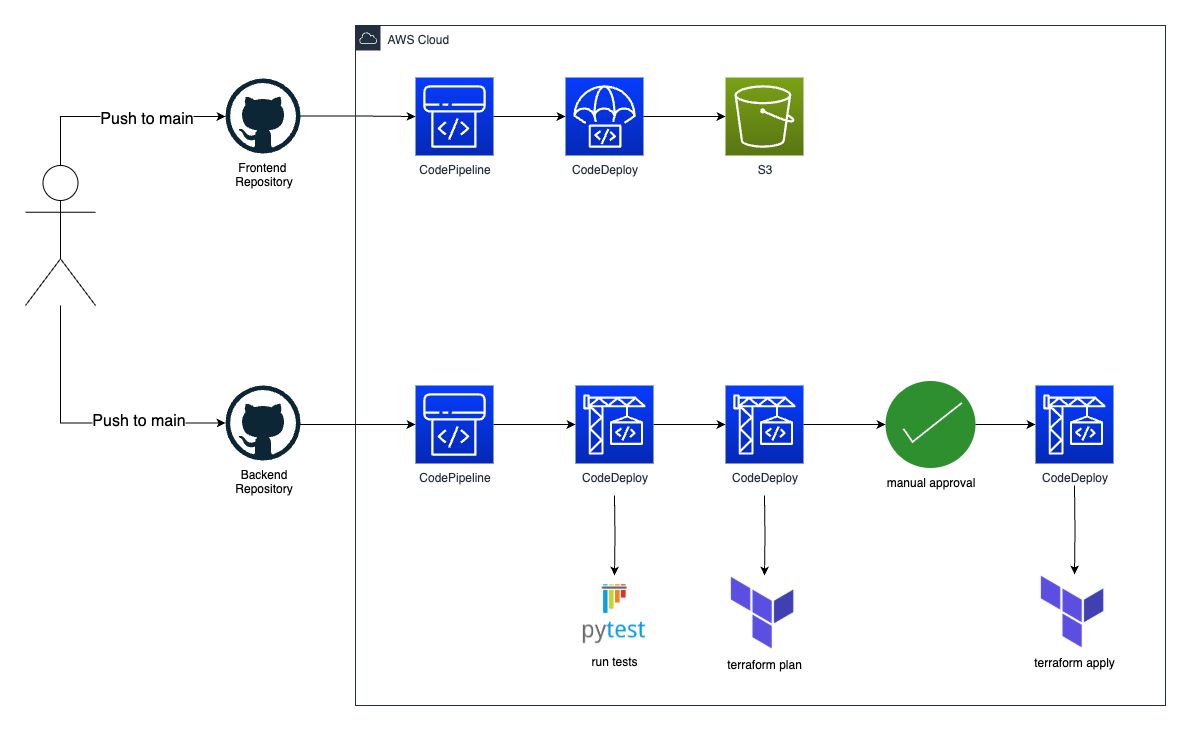
Ok, so what should our pipeline do? When we make a local change to our code and push it to main in github, we want the pipeline to be triggered. It should then:
- Test our code to make sure it works.
- Run
terraform plan - Have an approval step where we will check the plan before applying
- Run
terraform apply
Test our python code
We can start by setting up automated testing. When we created our lambda in the previous part we created some arbitrary tests so I could show of this feature. CodePipeline will have step that run CodeBuild, which will run our tests and run terraform. CodeBuild needs to connect to our GitHub repository. We will also need a role that CodeBuild can assume to run the tests and apply the terraform code. Since terraform will create and destroy resources, we will need to give it a lot of power. For CodeBuild to know what to do, we will create a buildspec file with instructions. Let’s start here.
buildspec_test.yml
version: 0.2

phases:
  install:
    runtime-versions:
      python: 3.13
    commands:
      - pip install --upgrade pip
      - pip install pytest boto3
  build:
    commands:
      - python -m pytest --junitxml=pytest_reports/pytest_report.xml

reports:
  pytest_reports:
    files:
      - pytest_report.xml
    base-directory: pytest_reports/
    file-format: JUNITXML
This file tells CodeBuild to run our tests and generate a report which will be available in the AWS Console. Pretty cool.
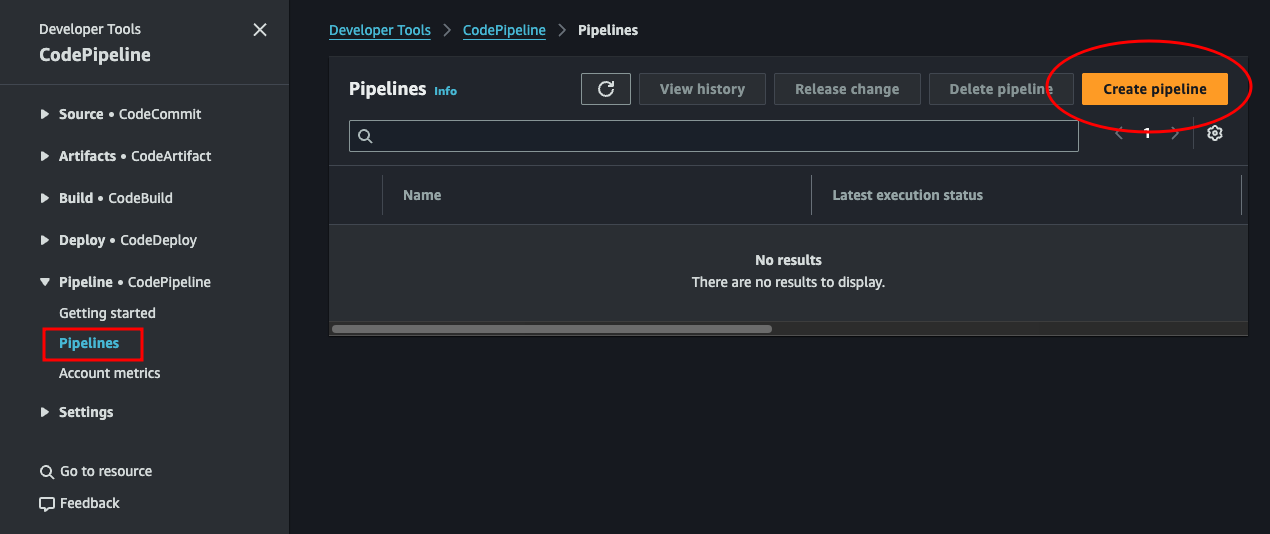
Let’s save this file in the root of our backend project directory. Then navigate over to the AWS CodePipeline Console and let’s set up our first pipeline.
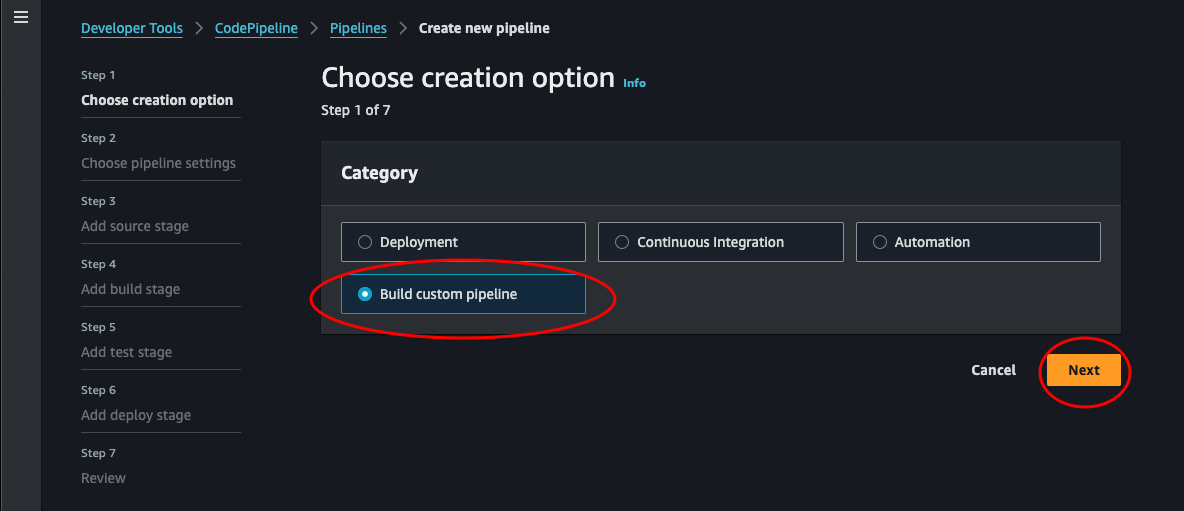
-
Choose creation option: Choose Build custom pipeline and click next
-
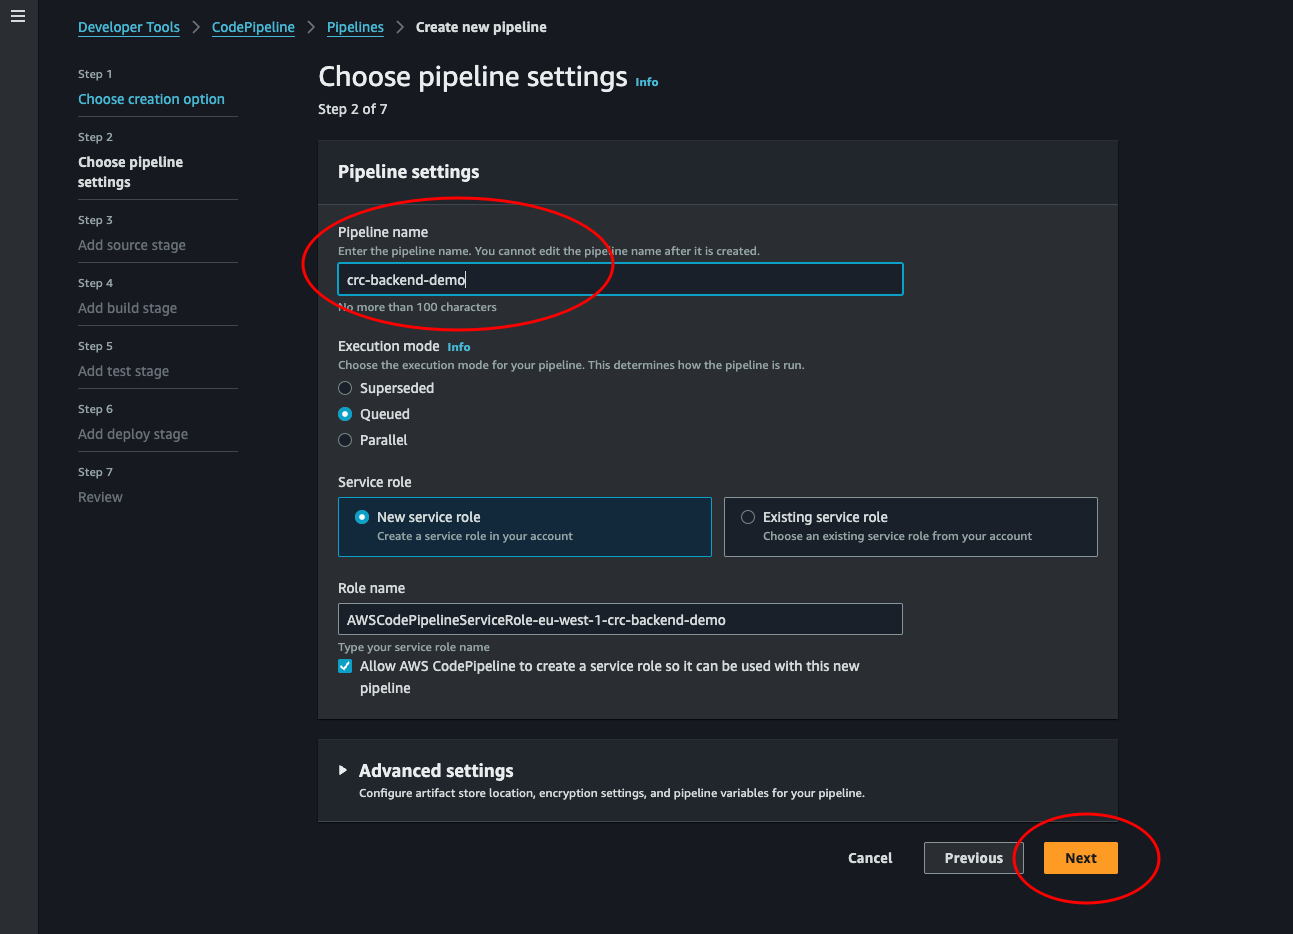
Choose pipeline settings: Give the pipeline a name and leave the rest. We could set the role name or use an existing. But I think the simples way to do this now is just to leave it as is and edit the role created by AWS later. Click next.
-
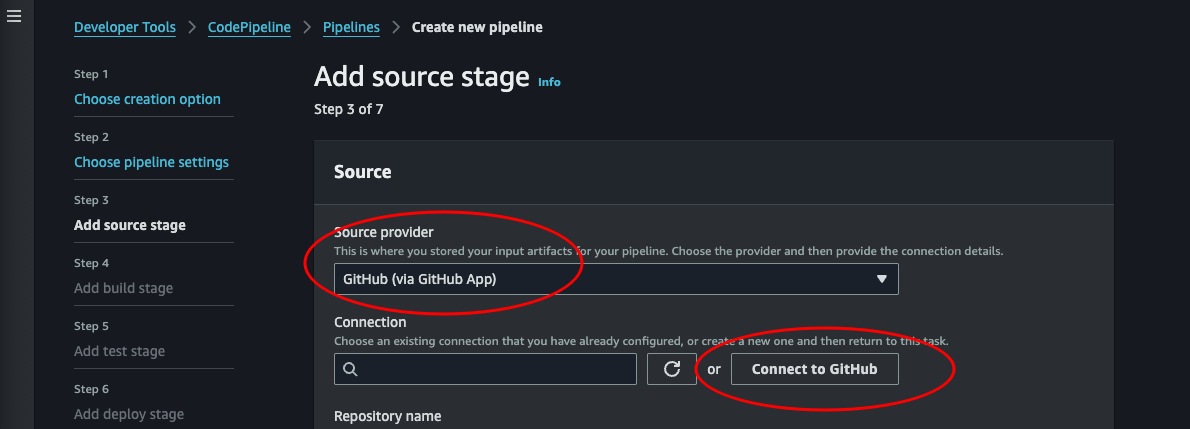
Add source stage: Now we will need to connect our GitHub. Select GitHub (via GitHub App) as source provider. Then click Connect to GitHub. This will open a pop-up where we can connect to our GitHub account.
-
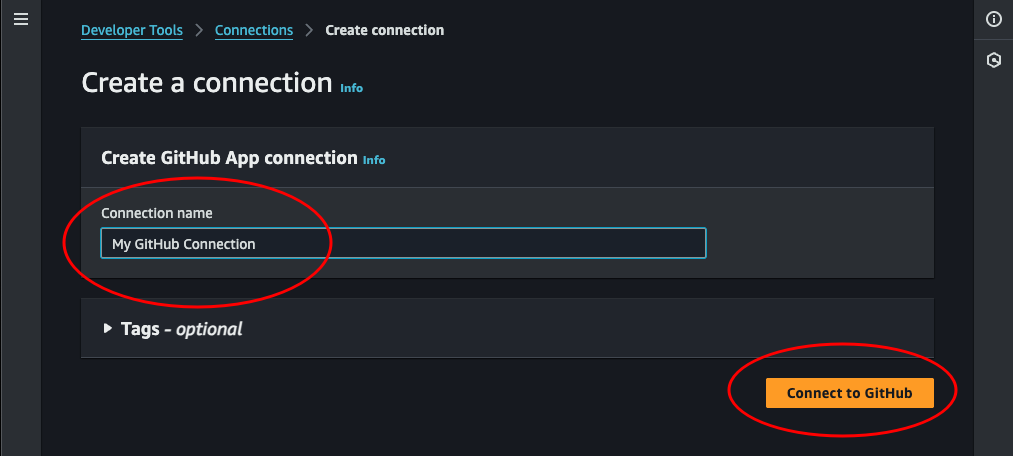
Connect to GitHub: Set a name and click Connect to GitHub. This will load some new options into the same page.
-
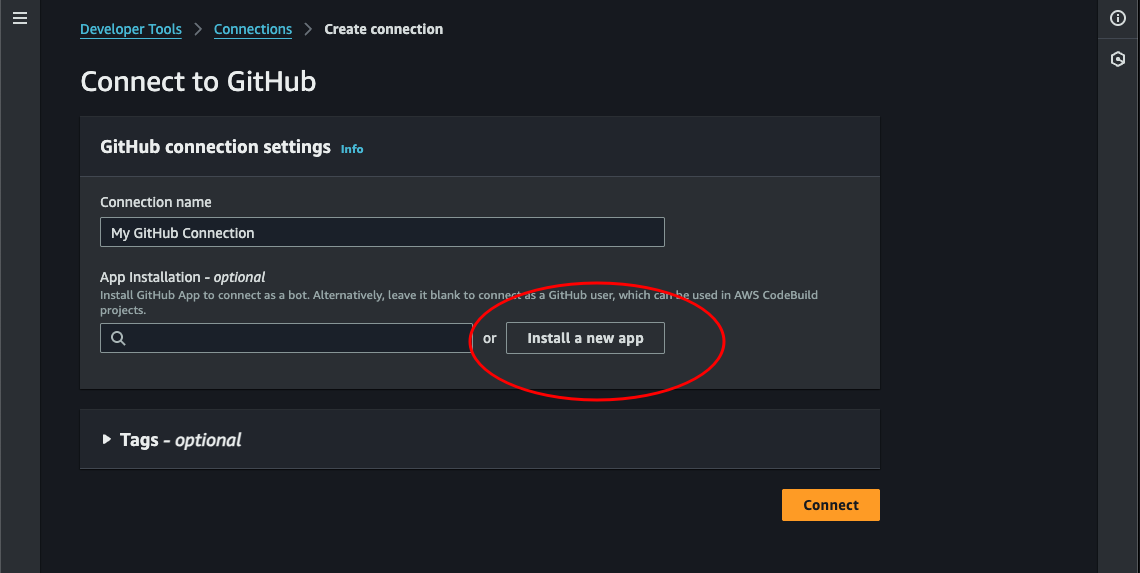
Now we can click Install a new app. This will launch a pop-up where we can select our GitHub account. Choose it, then click Connect.
-
We can choose to select only our backend repository for now to give the least access needed. This can be changed later from the GitHub settings Applications.
-
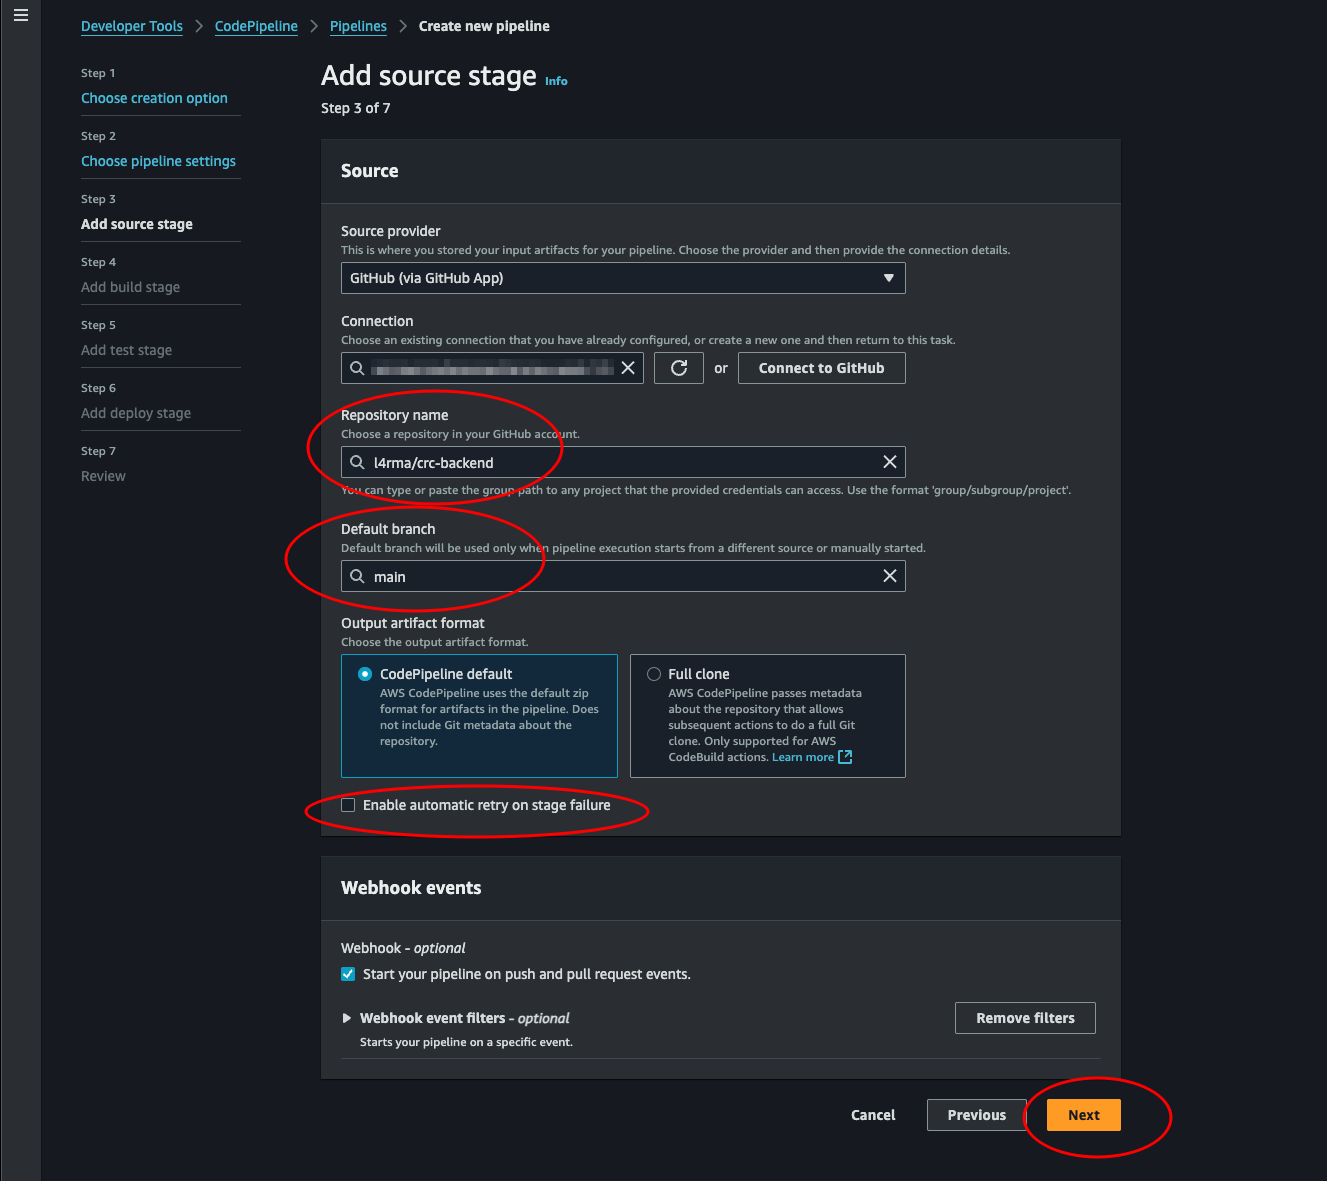
Now we should be able to see our repository and branch and select them. Let’s uncheck the auto retry failed stages, then hit Next.
-
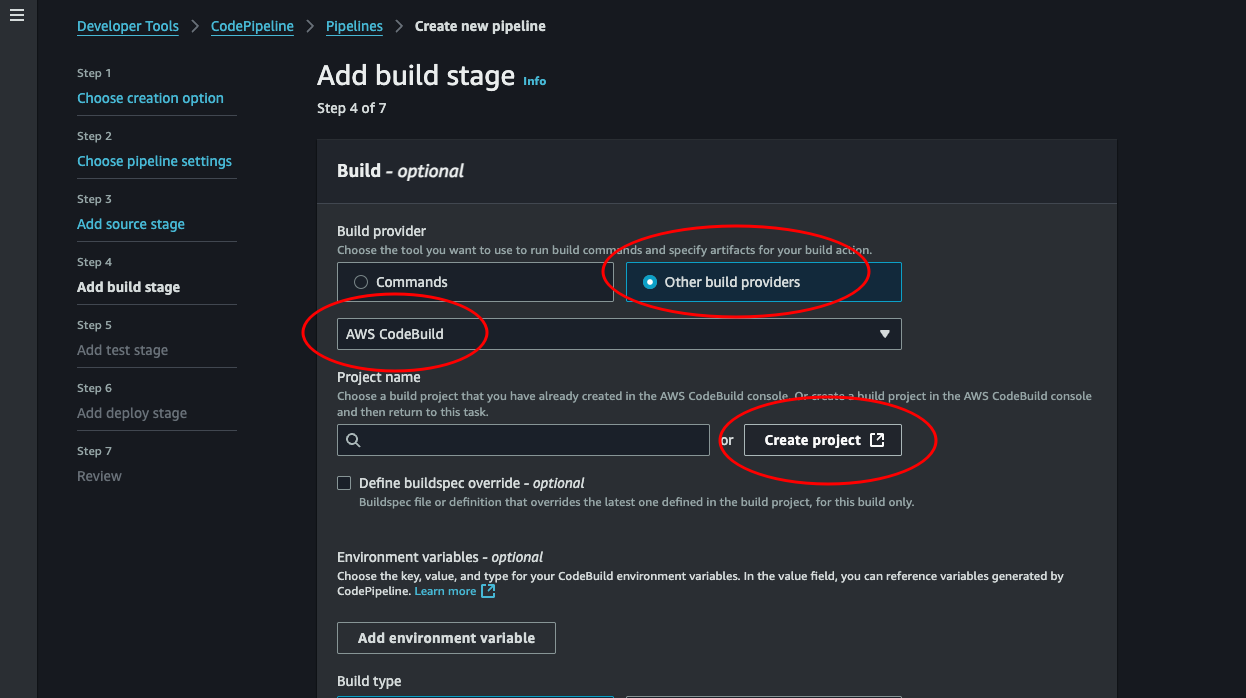
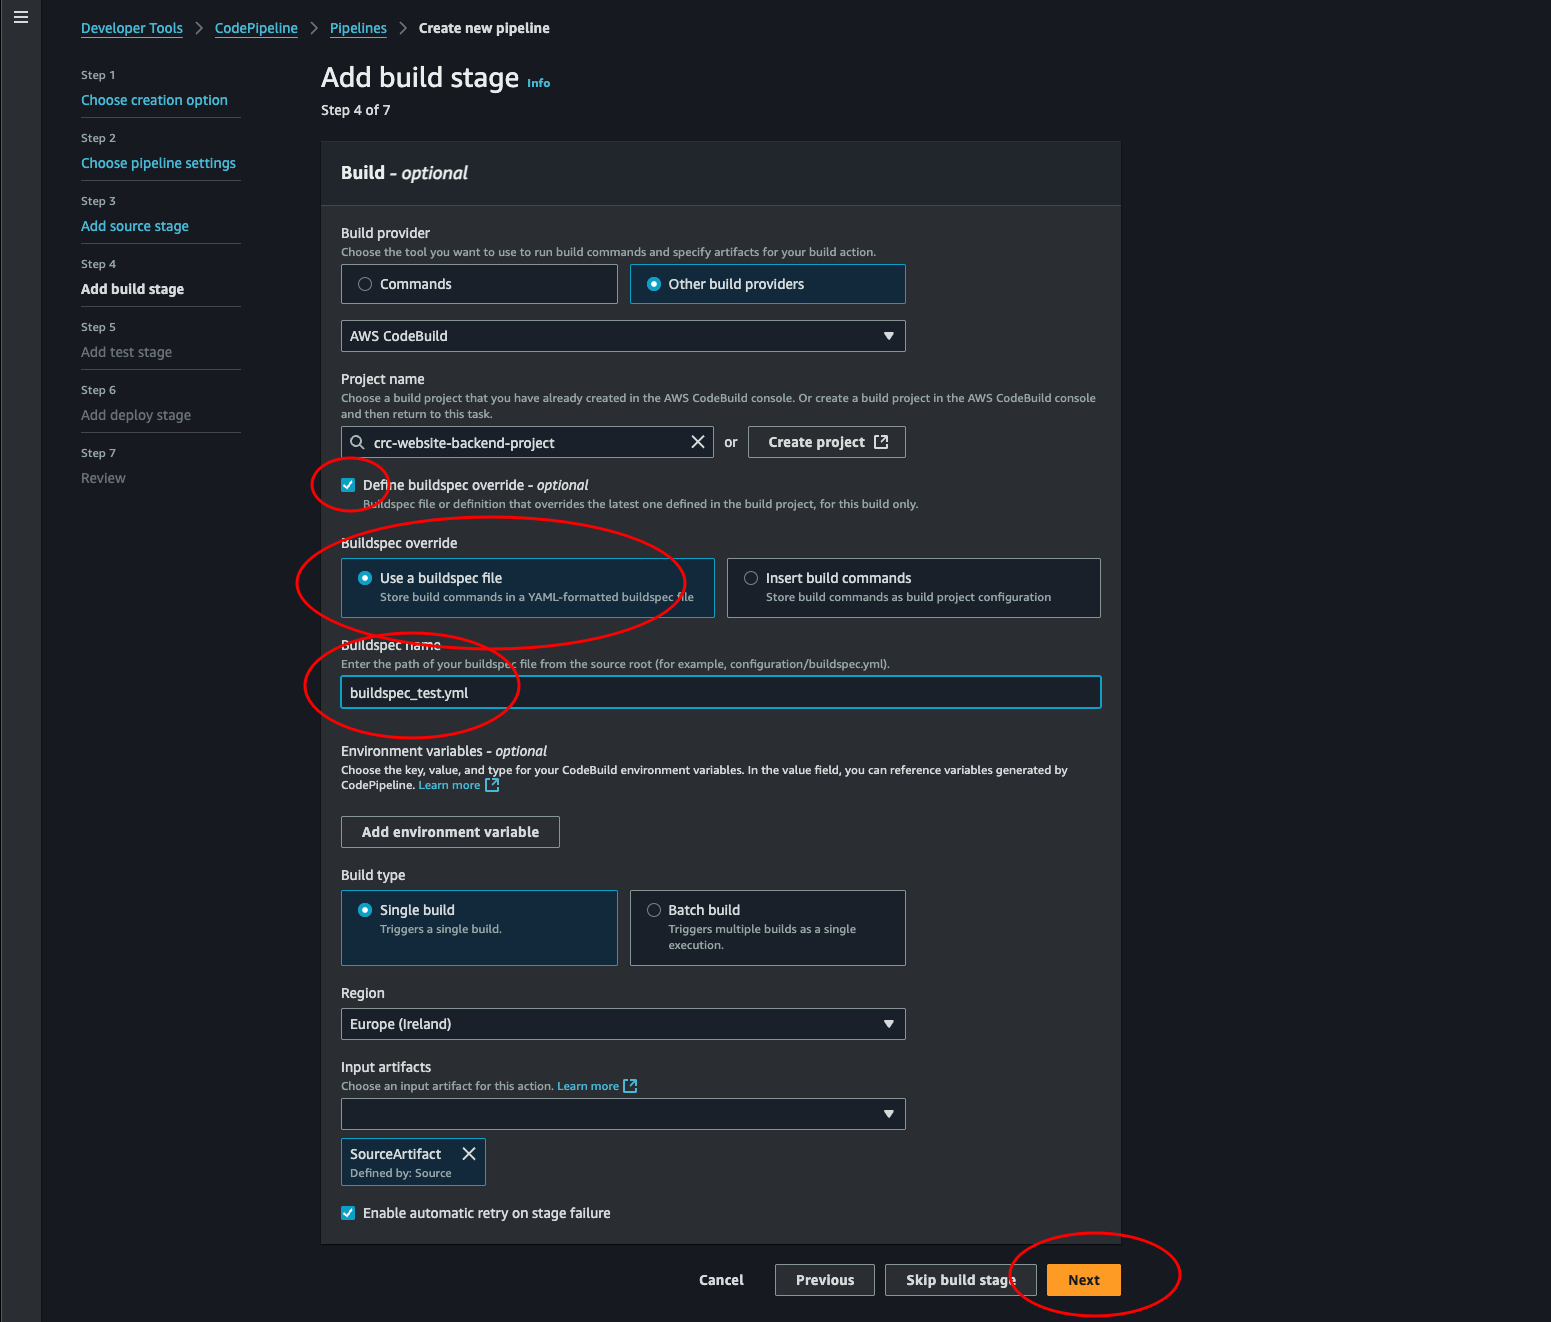
Add build stage: This step says build stage. And the next is the test stage. We’re not building any code, since we use python. What we want to do is create a zip/artifact and upload it as a lambda. Terraform does this for us, so we actually need to test before “building”. Choose Other build providers and select AWS CodeBuild. Then we need to create a project. Click the Create project button.
-
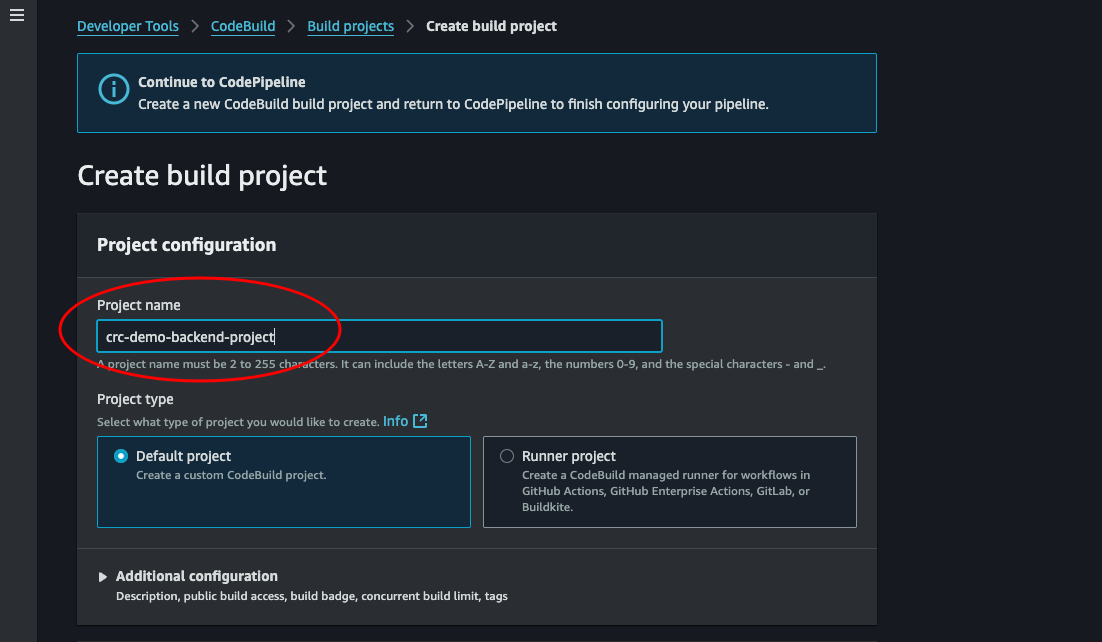
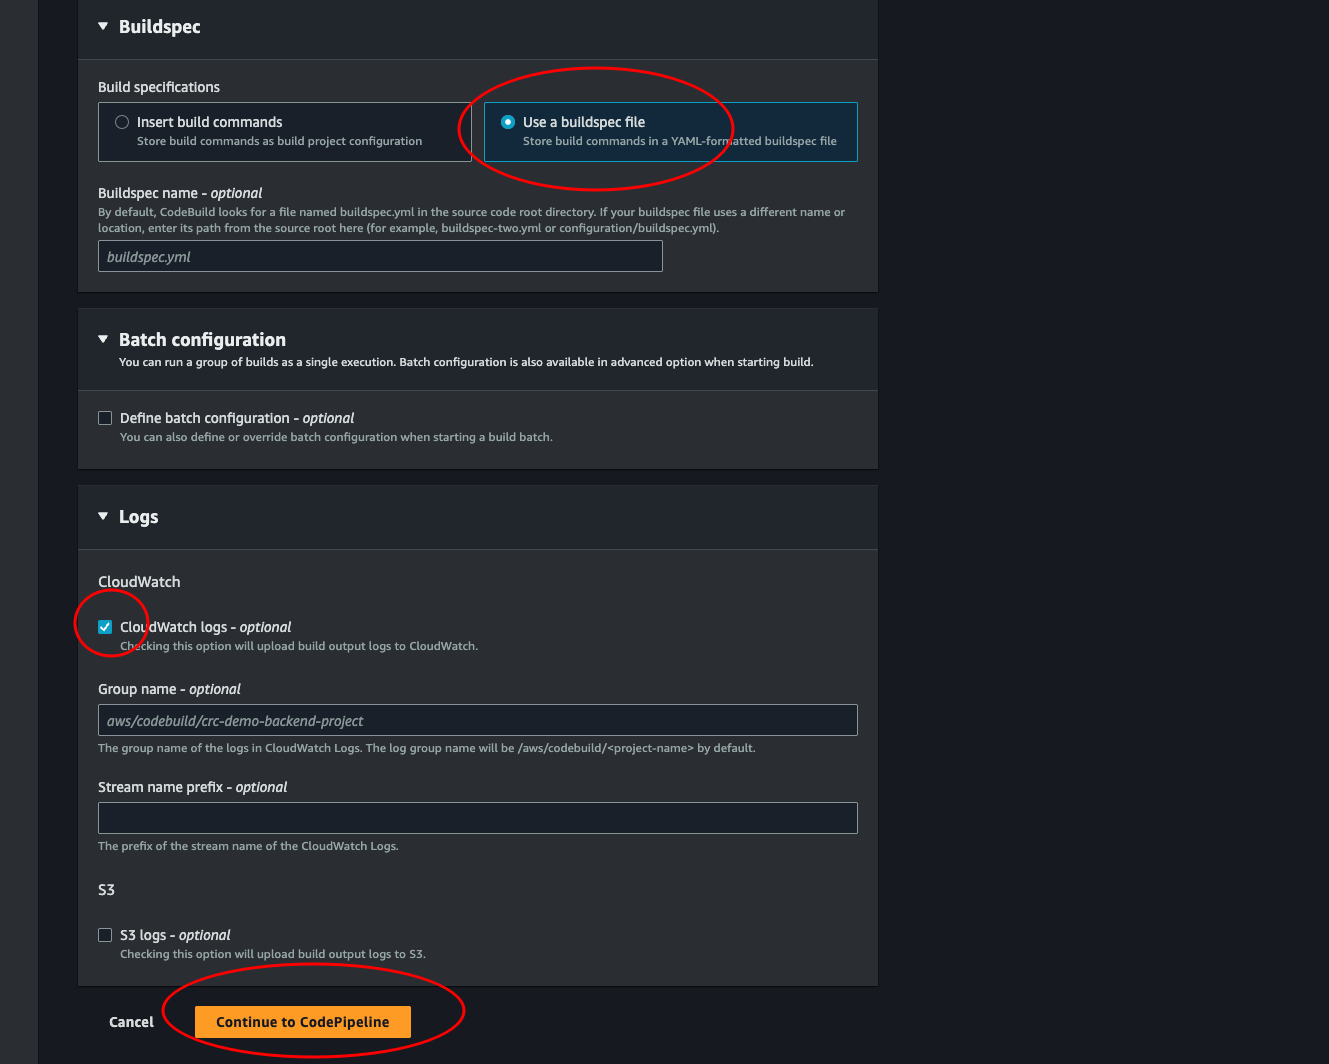
Create Project: Give the project a name and we can leave almost everything as is. We just need to change buildspec.
-
Select Use a buildspec file. We could change the default name, but we will override this later anyways. So it doesn’t matter. Make sure to leave the CloudWatch logs selected. We need logs if we ever need to know what’s going when there are errors. Then click Continue to CodePipeline.
-
Ok, now we see our project. Select Define buildspec override - Optional and enter the name of the buildspec file we created for running the tests. Unselect Enable automatic retry on stage failure. Then click Next.
-
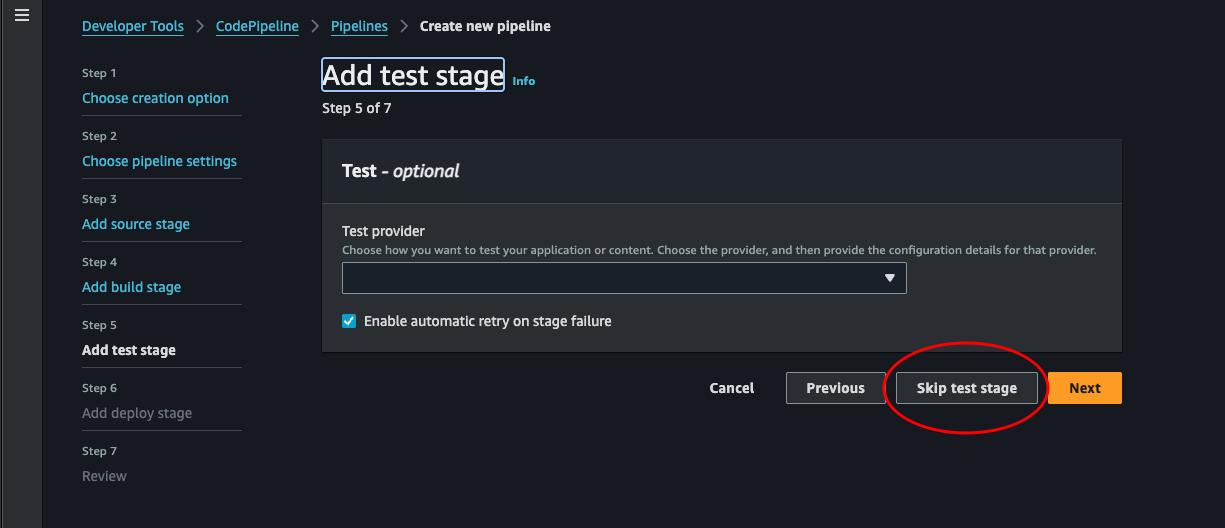
Add test stage: We will skip this step for now.
-
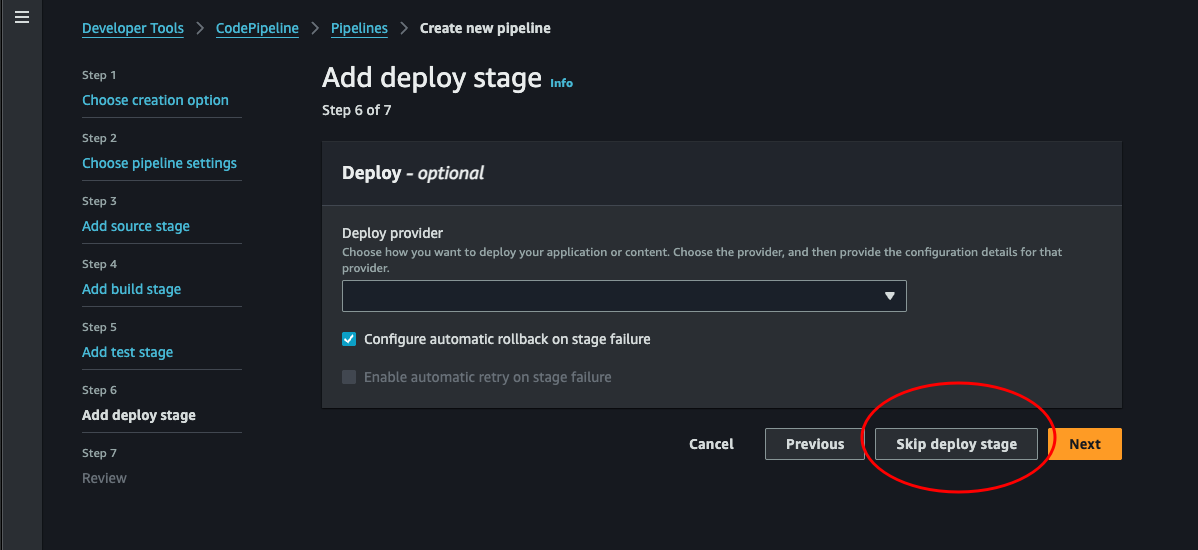
Add deploy stage: We will skip this step for now.
-
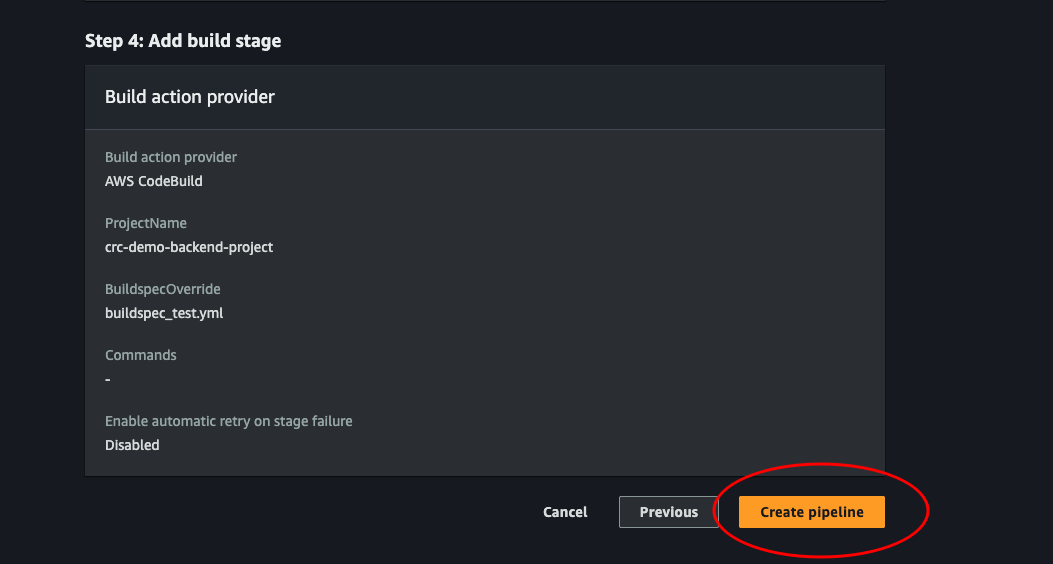
Review: Finally create our pipeline by clicking Create pipeline.
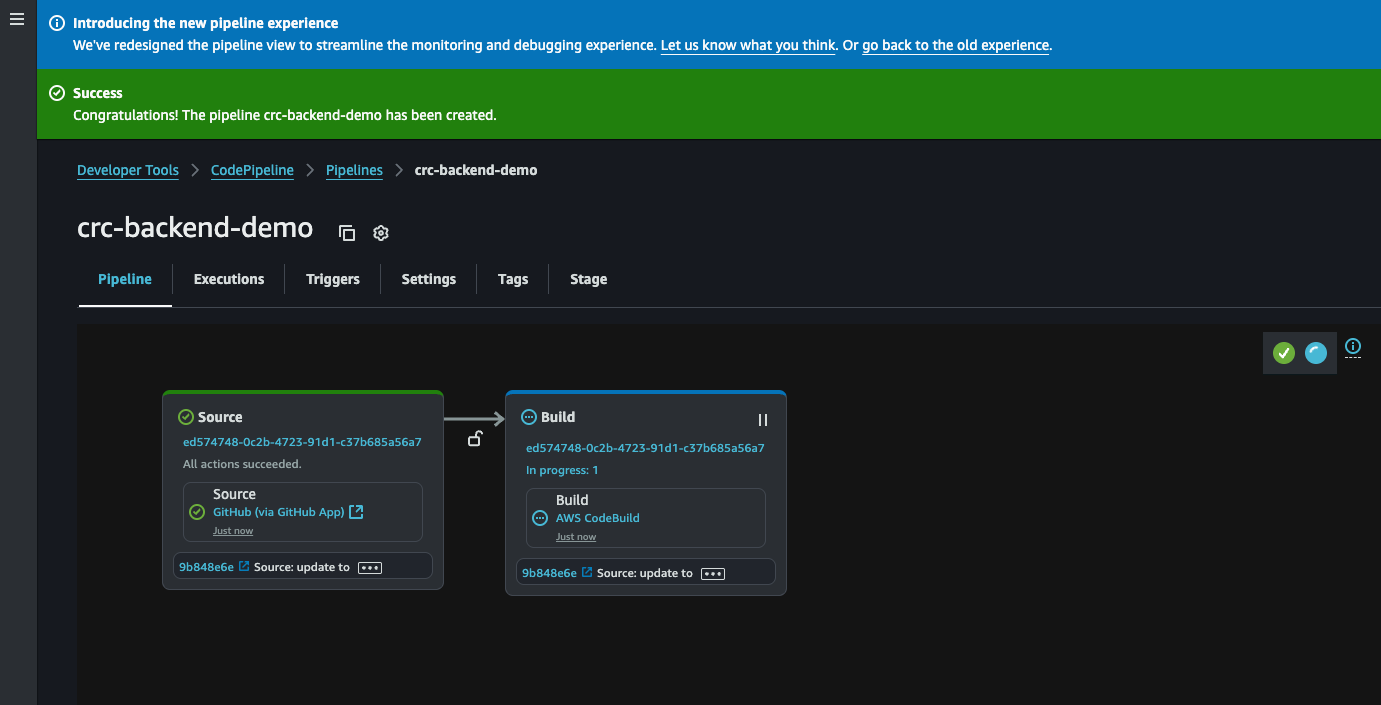
You will be taken to the console page of our pipeline, which will do an initial run automatically.
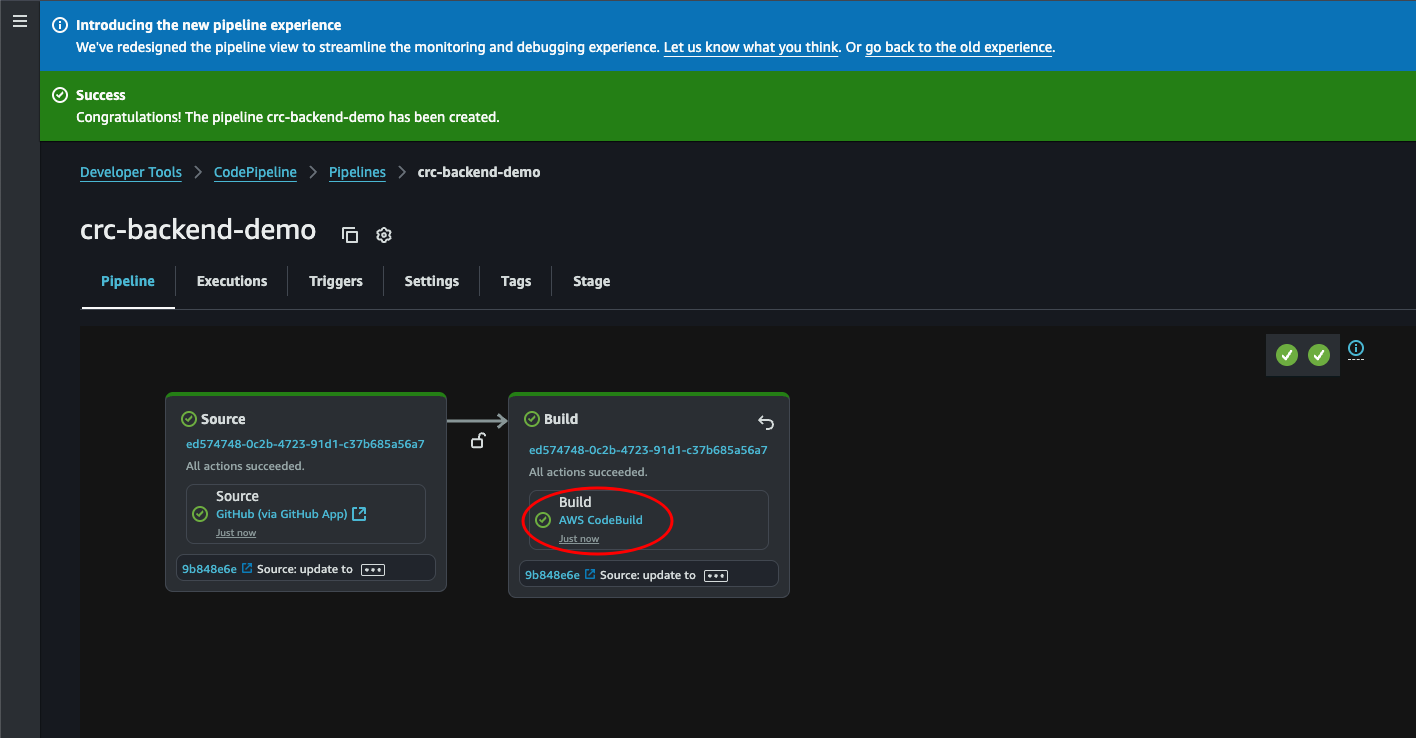
When everything is green and beautiful we can click on the build part to take a look at the run.
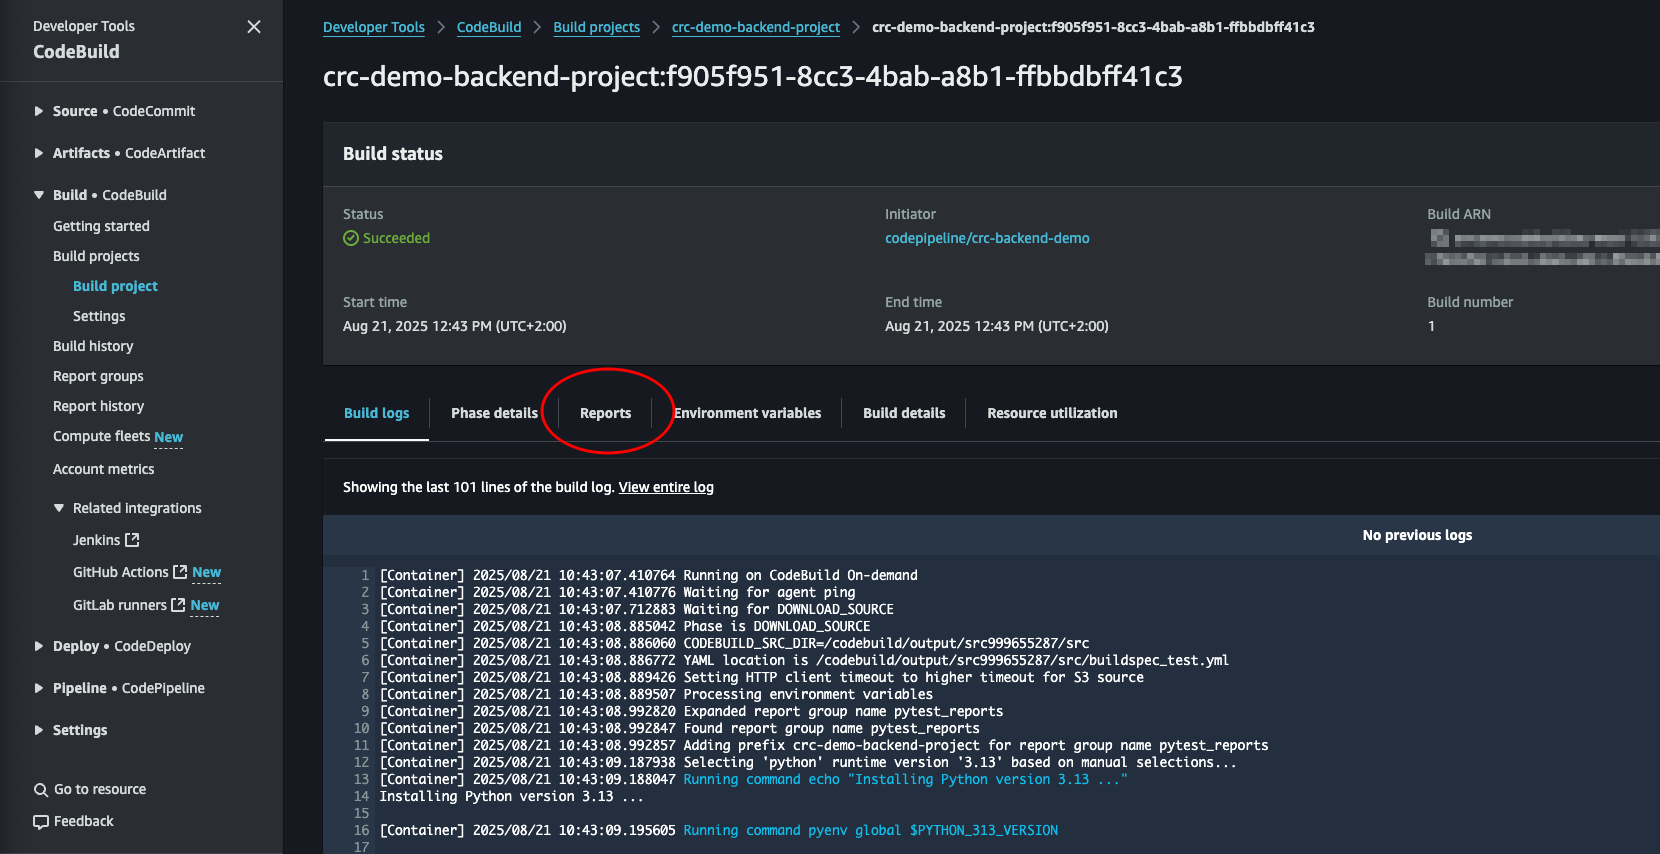
Here we can see the log file. Here we see python being installed, pip installing our dependencies, and then Pytest running our tests and generating the report. Let’s click the Reports tab to see the test result in our Console rather than the log file.
We can click the report to see the result.

And there it is. Perfect. We can see all our test. Their status and the run duration. This is super useful for bigger projects to get a good overview!

Great. First step is completed. Our code will now automatically be tested each time we push code to the main branch. Next, let’s automate terraform plan.
Terraform Plan
This part will be much easier since we already created the foundation of the pipeline.
The first thing we need are some instructions for AWS CodeBuild. In the root directory of our backend project, we’ll create a file called buildspec_plan.yml:
version: 0.2

phases:
  install:
    commands:
      - echo Installing Terraform...
      - sudo yum install -y yum-utils shadow-utils
      - sudo yum-config-manager --add-repo https://rpm.releases.hashicorp.com/AmazonLinux/hashicorp.repo
      - sudo yum -y install terraform

  build:
    commands:
      - echo Running Terraform Init
      - terraform init
      - echo Running Terraform Plan
      - terraform plan -out=tfplan

  post_build:
    commands:
      - echo "Completed Terraform plan phase"

artifacts:
  files:
    - '**/*'
This file will run terraform plan and store the plan as an artifact, which will be accessible in the next stage where we will apply the plan.
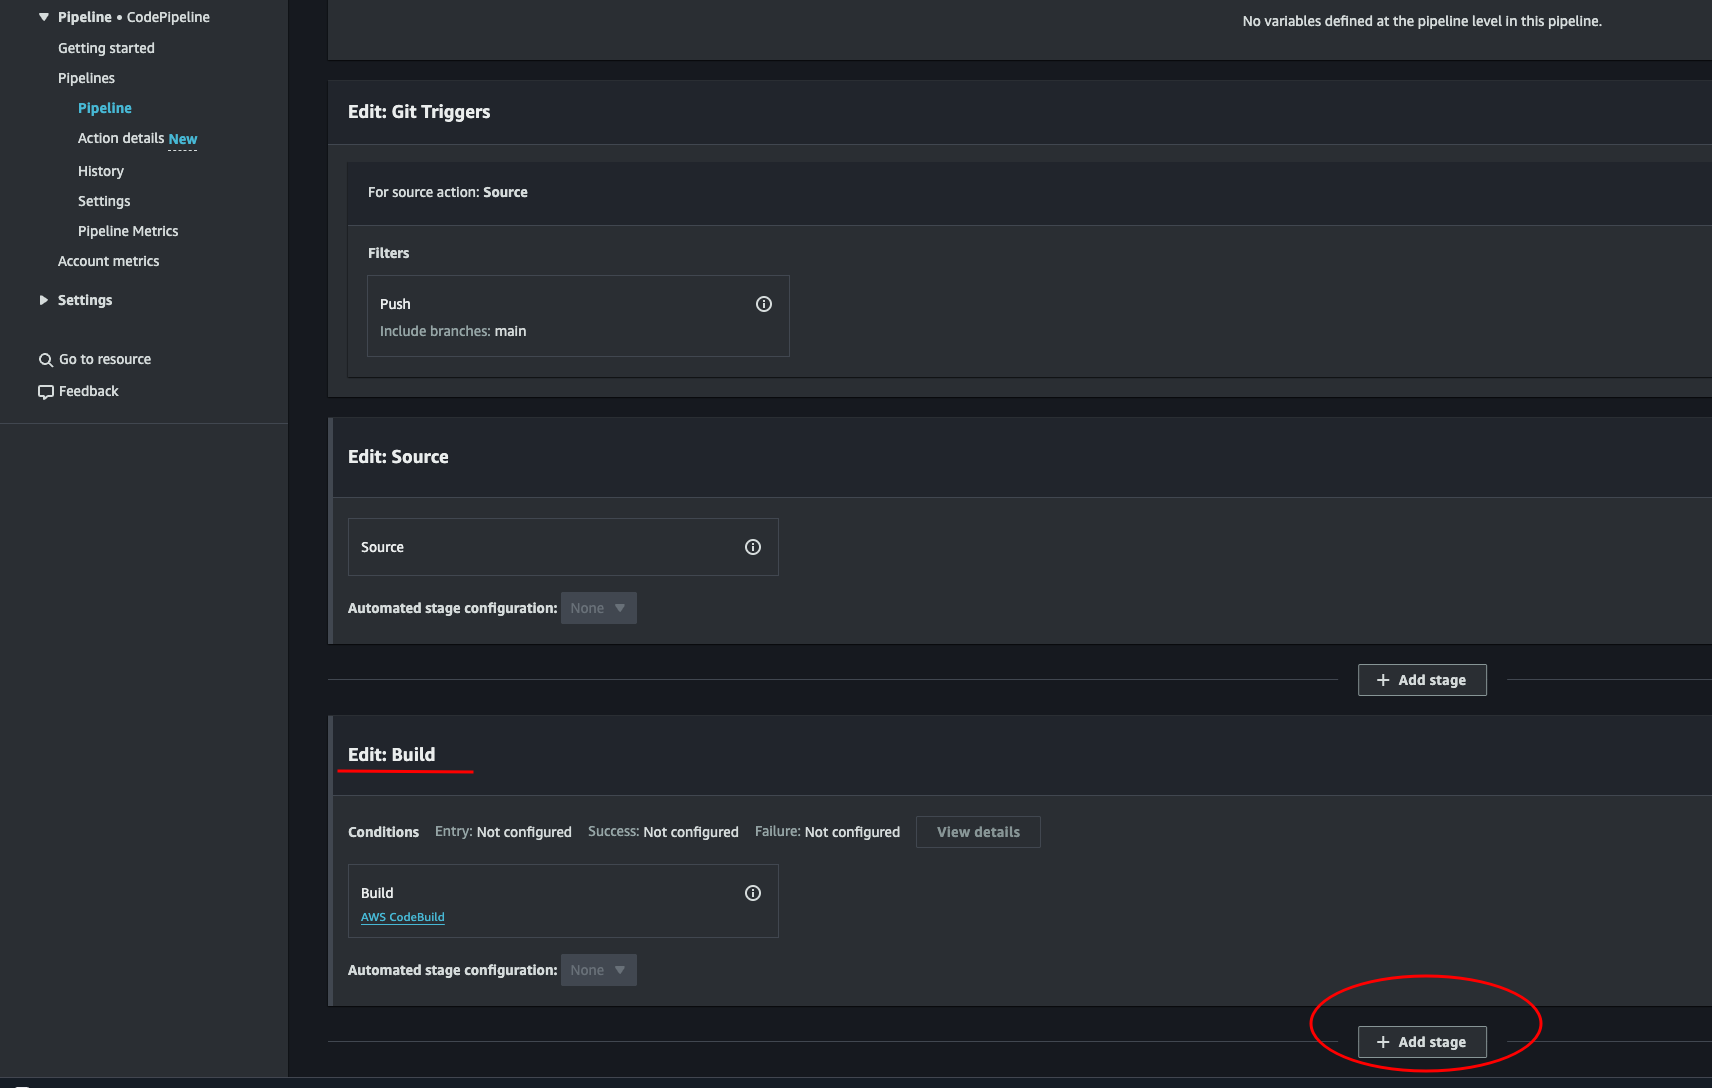
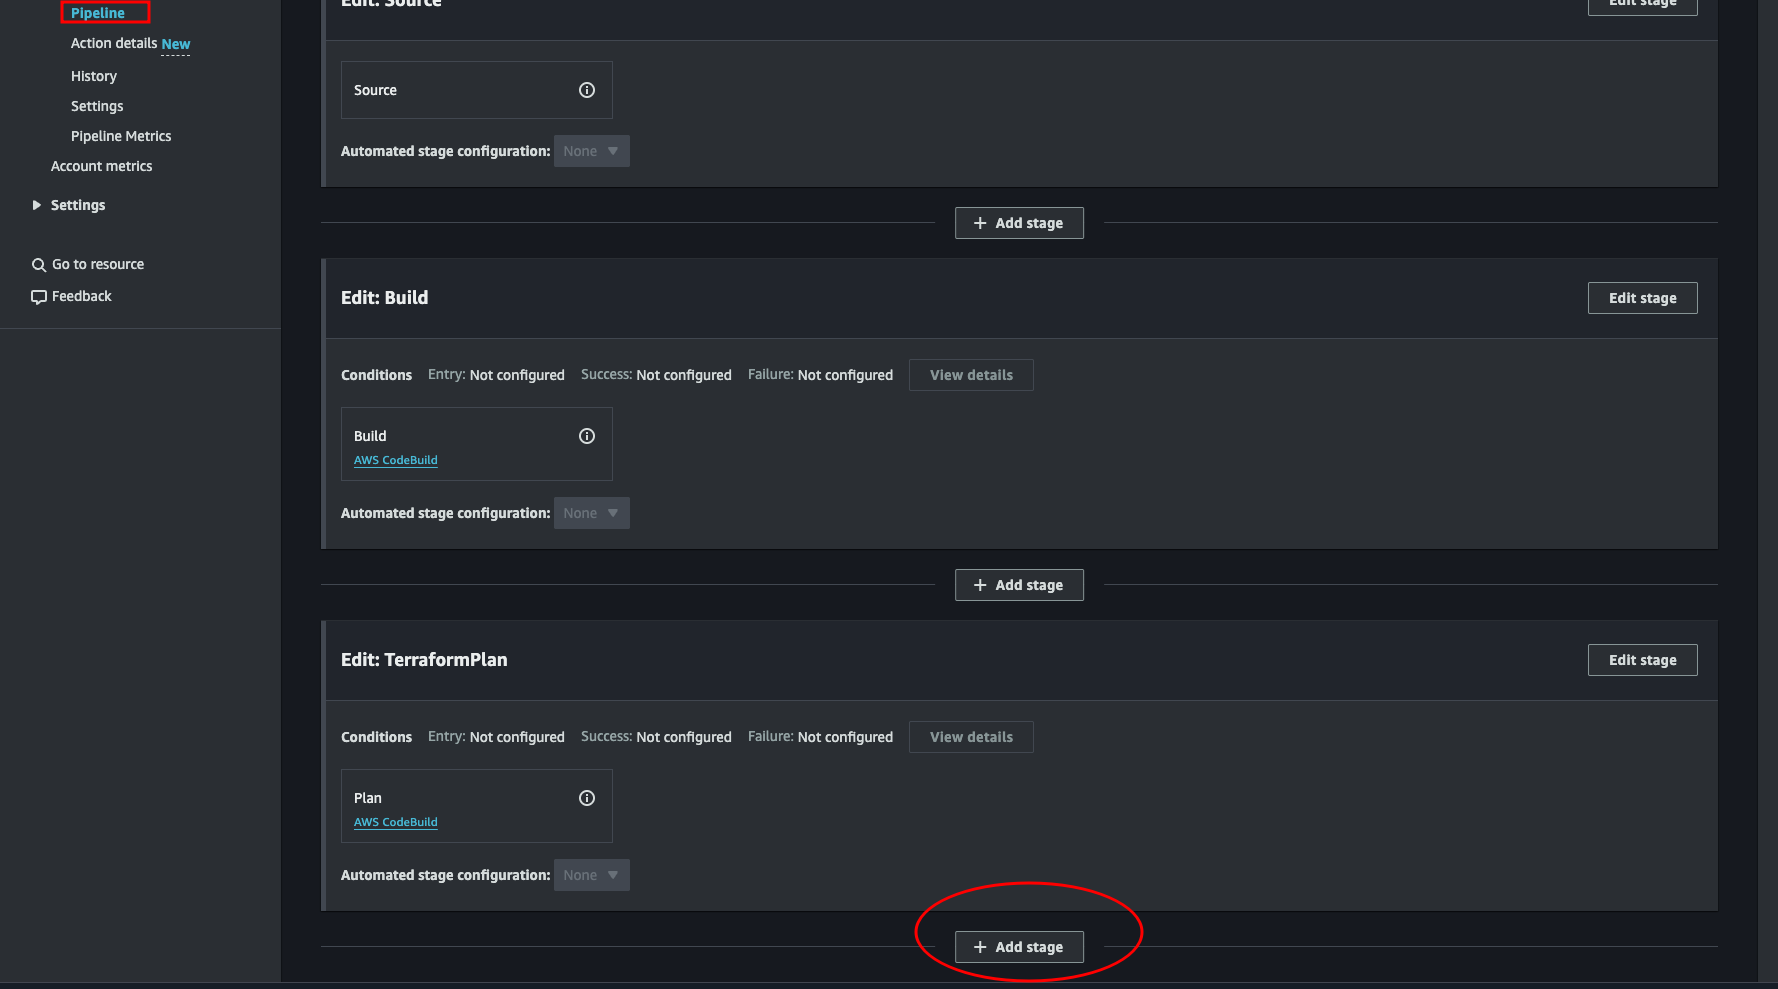
Navigate back to our pipeline (where we saw the two steps run green) and click the Edit button. Scroll down and under the Edit: Build, click + Add stage.
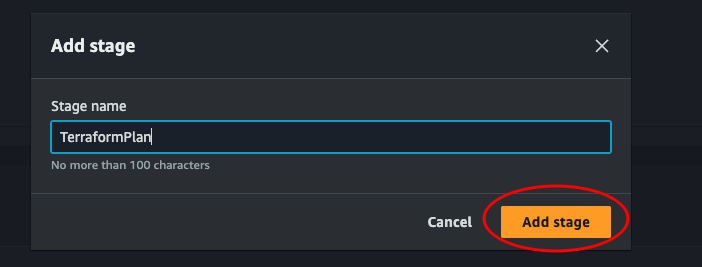
Give the stage a name and click Add stage.
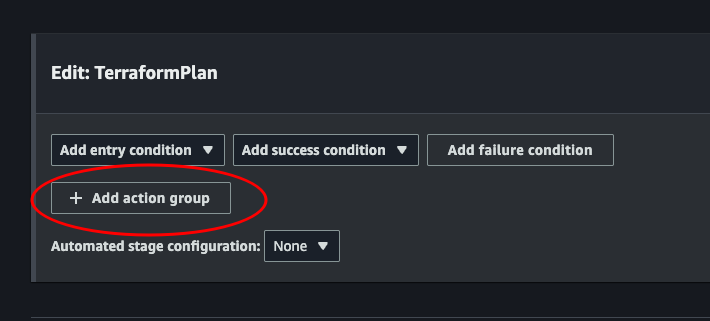
Click + Add action group
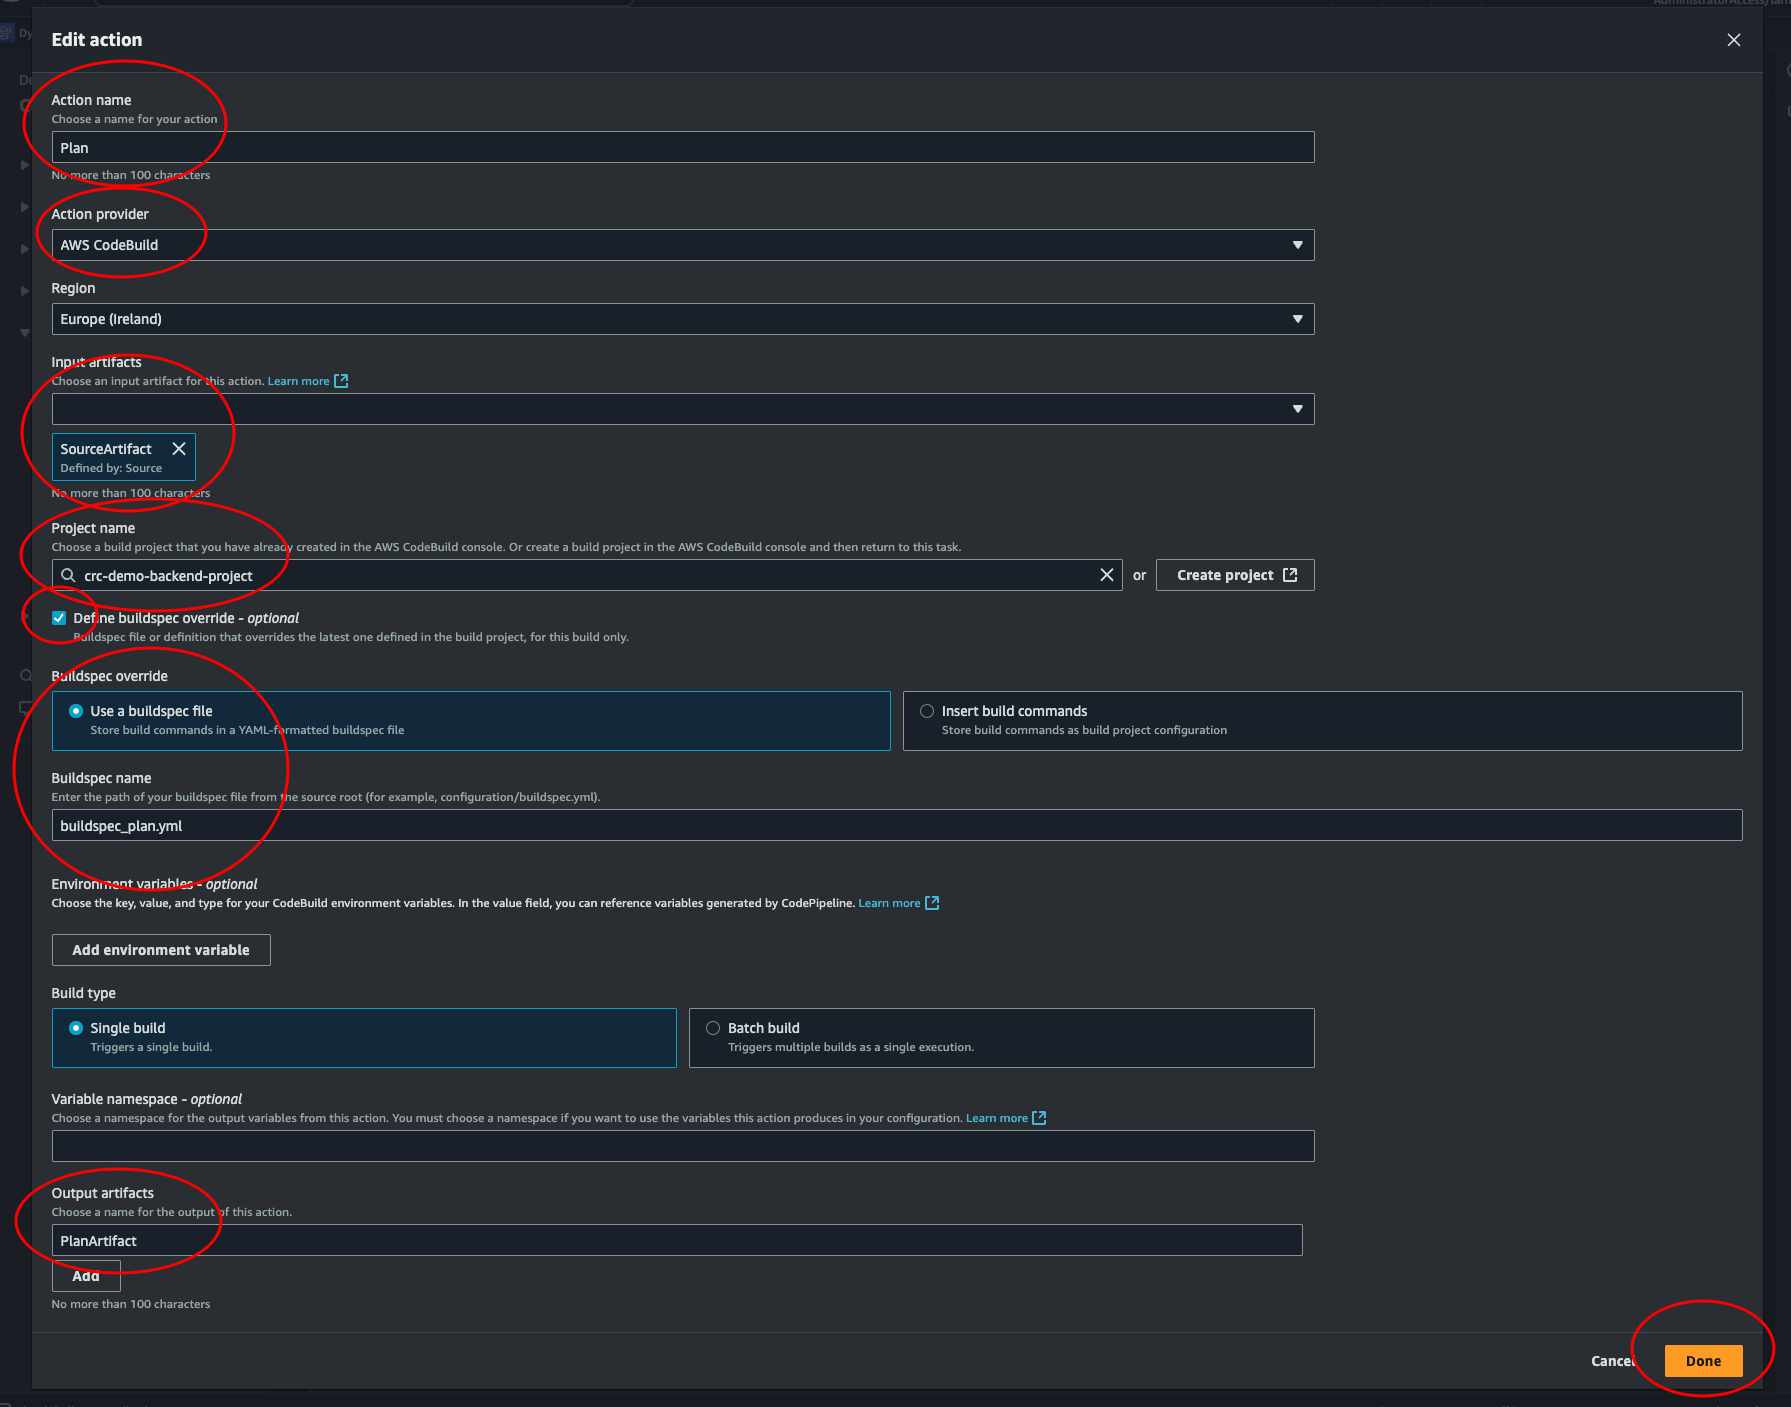
Choose a name, and select AWS CodeBuild as an action provider. This should look familiar. Use SourceArtifact as Input artifacts, choose our project, override the buildspec, enter the name of our terraform plan buildspec file. Set a output artifact PlanArtifact. This is where our tfplan will be stored. And we will input this in the apply stage to access and apply this plan. Then click done.
The pipeline won’t be triggered automatically now. Let’s try to trigger it by pushing to GitHub. Do some arbitrary change, like adding a line in the readme. This is just to check that a push to main will trigger our pipeline, and also check if our latest step will work. (Spoiler alert: it won’t…)
So if we look at the log, we see that the reason the stage failed is because we couldn’t initiate the backend. That is because our role does not have access to the bucket where our statefile is. We can easily fix this by adding the permission. But there is a lot more permissions we’re going to need. To save some time we will make a poweruser policy and add to our role so Terraform gets permission to create and delete difference resources. Navigate over to IAM > Policies > Create policy and select JSON.
TerraformPowerPolicy:
{
	"Version": "2012-10-17",
	"Statement": [
		{
            "Sid": "Admin",
            "Effect": "Allow",
            "Action": [
                "lambda:*",
                "apigateway:*",
                "dynamodb:*",
                "logs:*",
                "cloudwatch:*",
                "iam:*",
                "s3:*"
            ],
            "Resource": [
                "*"
            ]
        }
	]
}
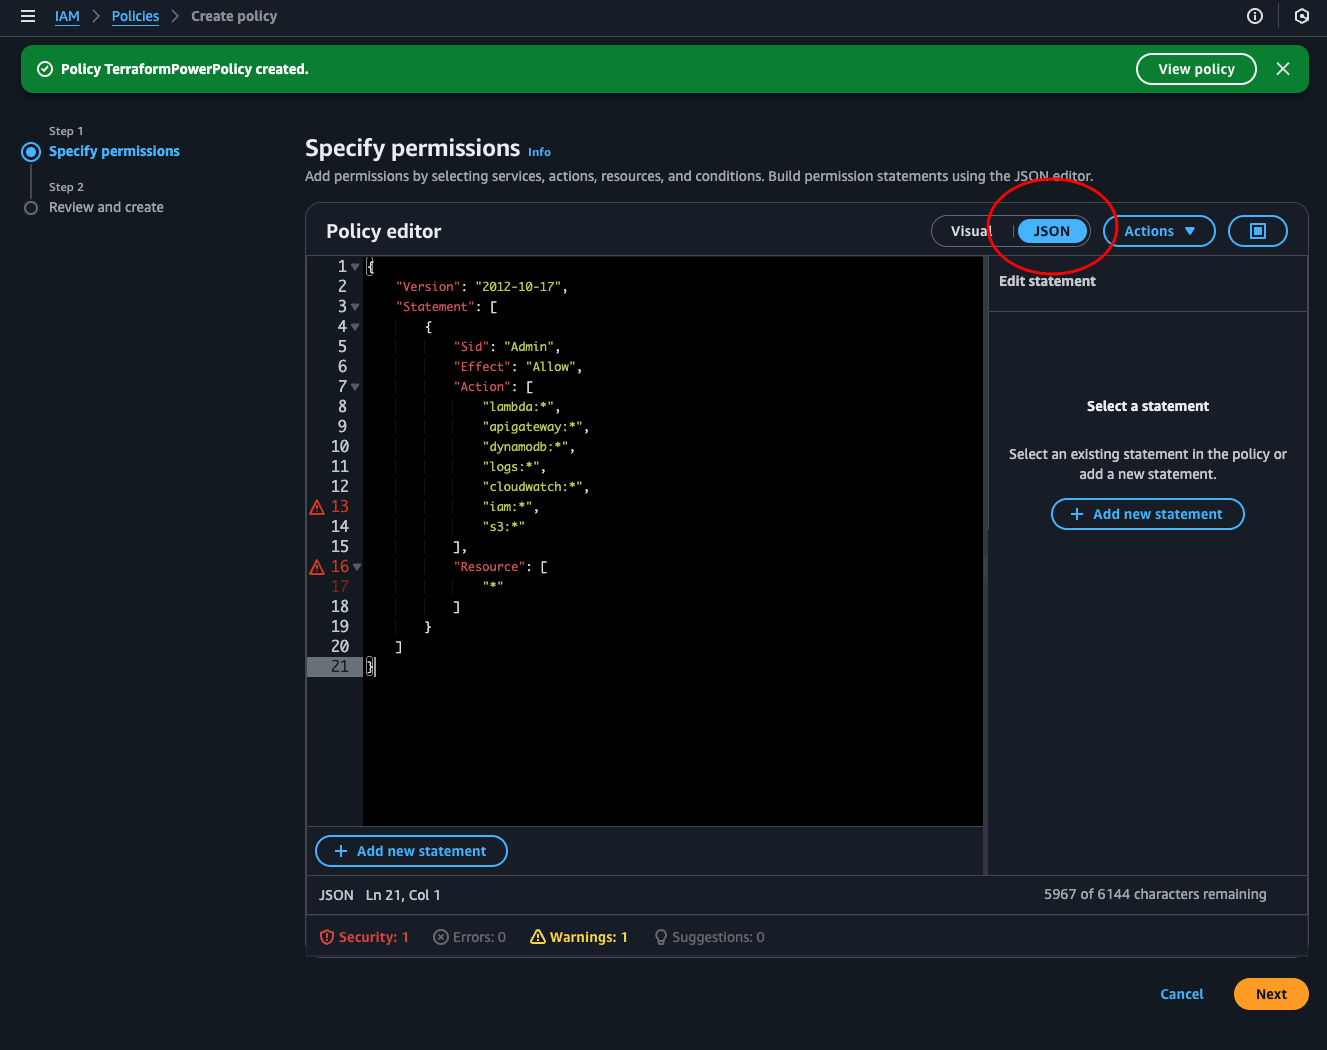
Notice that AWS doesn’t like that we use “*”. The best practice is to specify resource ARN or add conditions to the statement.
Now navigate to IAM > Roles and locate the codebuild--service-role. Click Add permissions > Attach policies.

Search for the policy we just made and add it.

Now, navigate back to CodePipeline and run the failed stage. This time it will succeed.
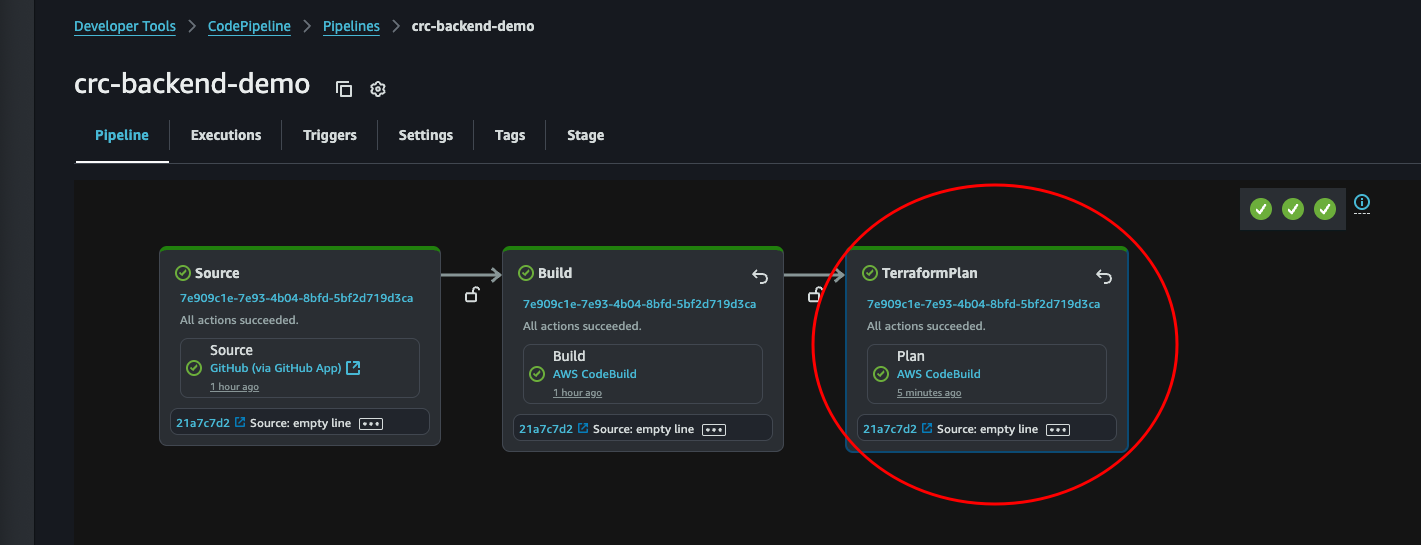
Yay! Remember to always celebrate when a stage or test or what ever runs green. You should never take that for granted.
Apply the plan
Ok, now we’re really starting to know what we’re doing. Let’s create a stage to run terraform apply. But first, we should also add a small stage in between to do a manual approval. That way we’re able to abort if we don’t like the result of the plan.
From the pipeline console (Developer Tools > CodePipeline > Pipelines > pipeline-name) click the Edit button to get back to the same place where we added the TerraformPlan stage.
Here we again scroll down to the bottom and click + Add stage.
Give the new stage a name. We could call it “ReviewPlan”, since we will manually approve the pipeline here if the plan is correct. But feel free to name it what ever you like.
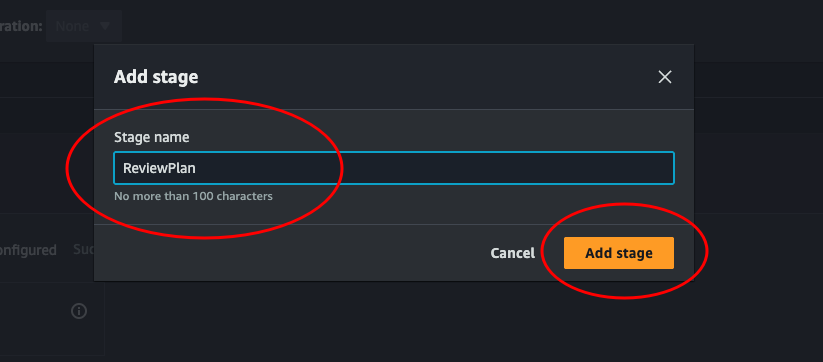
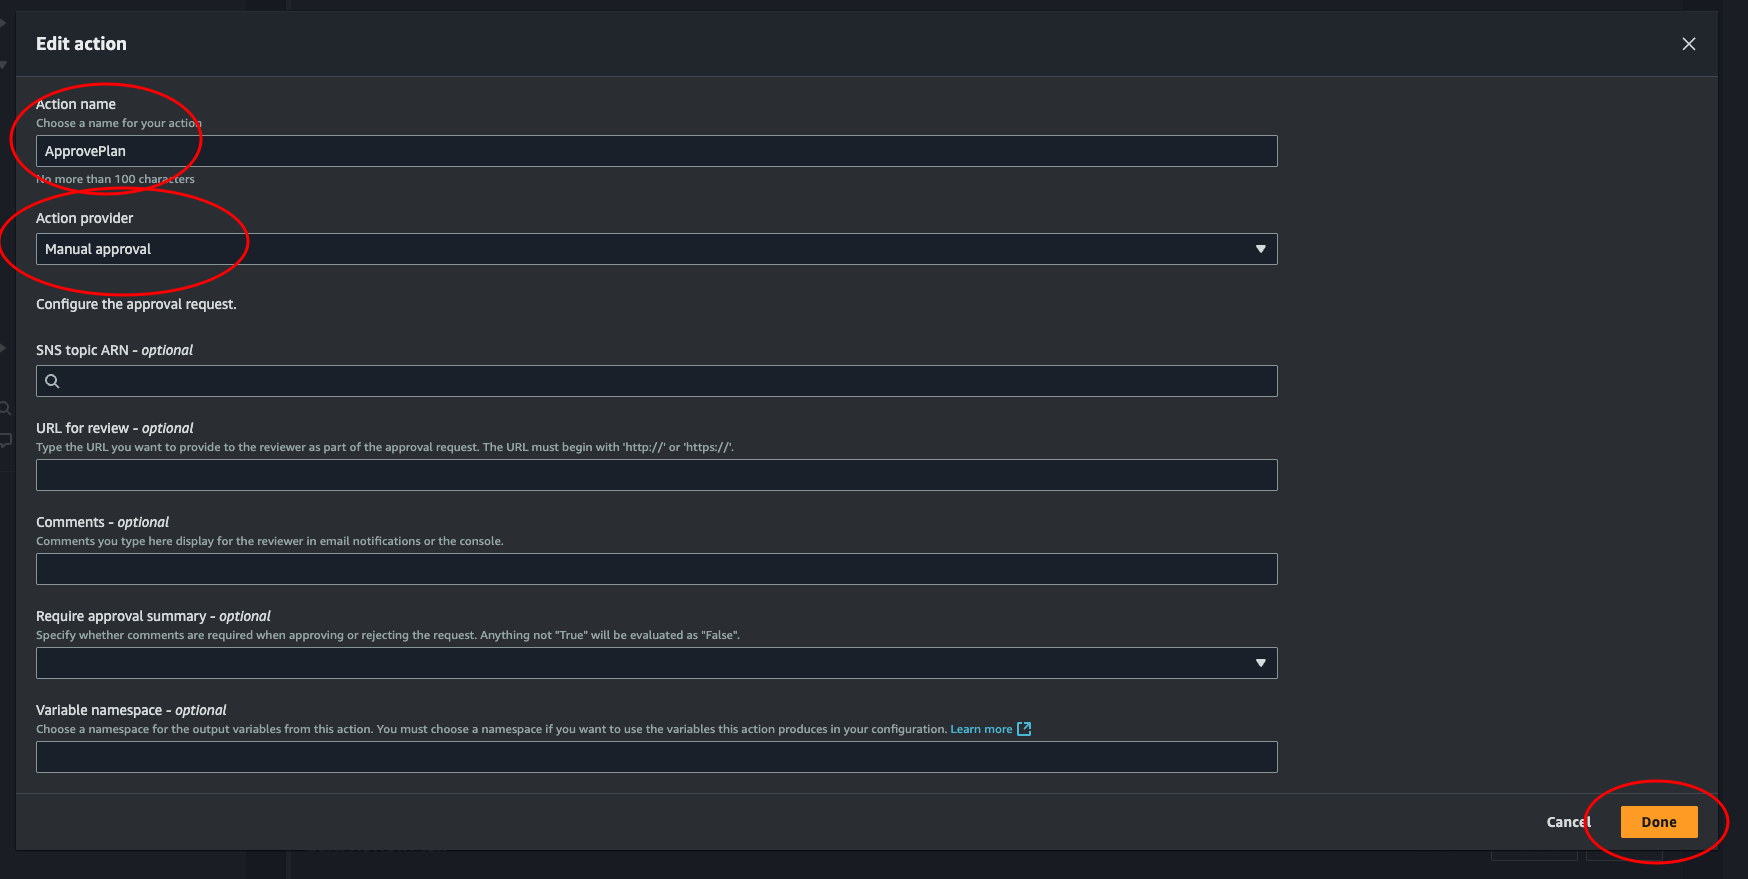
In the box for this new stage, click the button that says + Add action group, just like we did when creating the TerraformPlan stage. Then give the action a name, and at Action provider select Manual approval and leave the rest. Click Done. Then on the Edit: ReviewPlan box, click Done.
That’s it for the manual approval. Only one stage to go!
Before adding the last stage, we need to create a buildspec file for the apply step. This file will run terraform apply and apply the plan created in the previous step.
buildspec_apply.yml:
version: 0.2

phases:
  install:
    commands:
      - echo Installing Terraform...
      - sudo yum install -y yum-utils shadow-utils
      - sudo yum-config-manager --add-repo https://rpm.releases.hashicorp.com/AmazonLinux/hashicorp.repo
      - sudo yum -y install terraform

  build:
    commands:
      - echo Running Terraform Init
      - terraform init -input=false
      - echo Running Terraform Apply
      - terraform apply -input=false tfplan

  post_build:
    commands:
      - echo "Completed Terraform apply phase"

artifacts:
  files:
    - '**/*'
Push this new file to main, and let’s create the last stage of this pipeline.
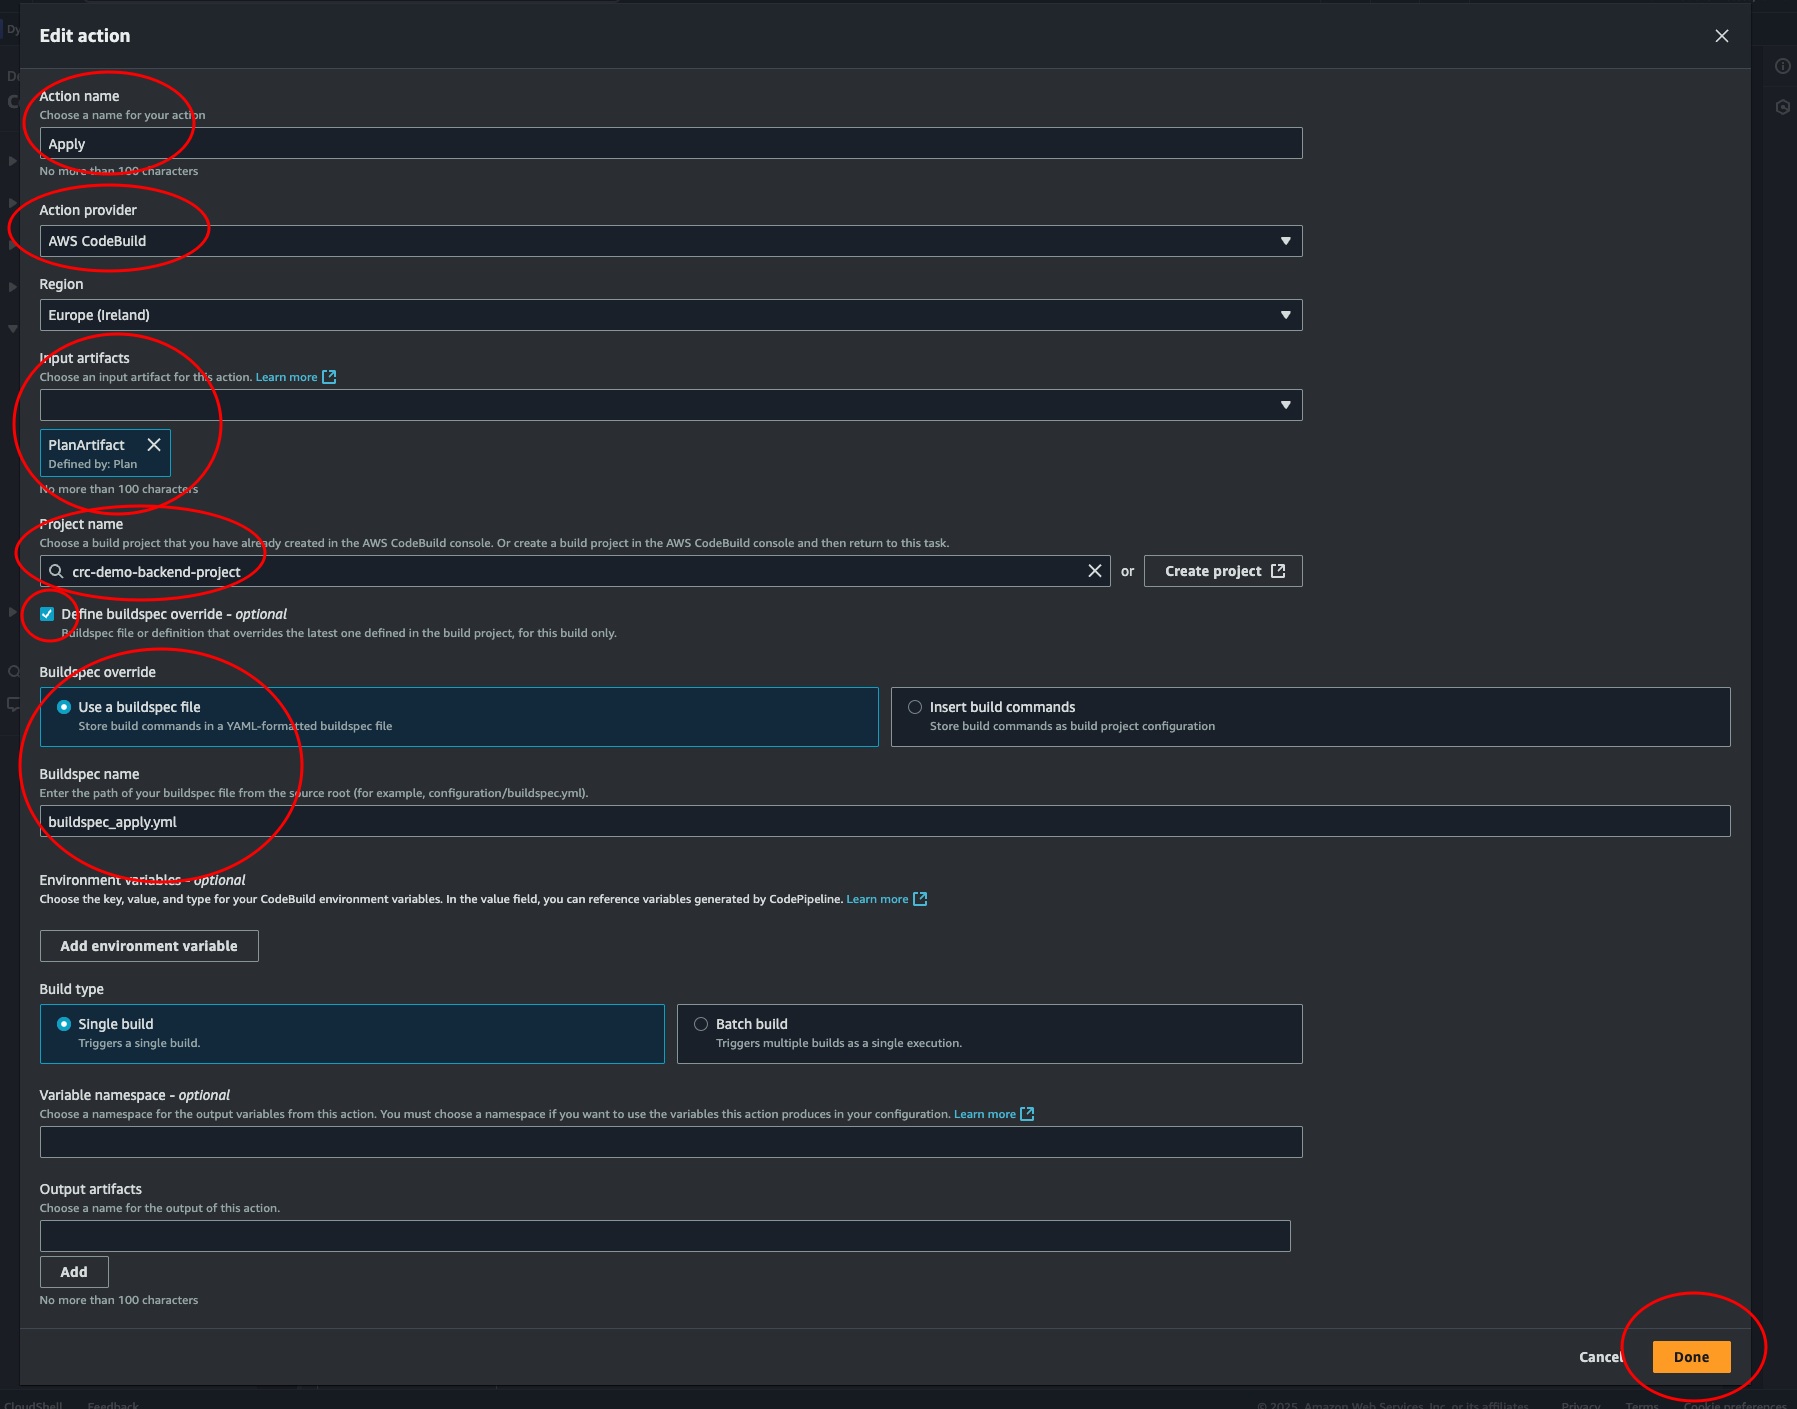
Again, at the pipeline console, click + Add stage and give it a name like
“TerraformApply”. Then click the + Add action group. Choose a name and select
AWS CodeBuild. For Input artifacts, we need the artifact created in the build
step “TerraformPlan”. Select our project and override the buildspec file. Enter
the name of our apply buildspec: buildspec_apply.yml. Leave the rest as
default. And click Done. Click Done in the stage box. Then scroll up to the
top and click the Save button.
Ok, we’re ready for the ultimate test. Let’s trigger the build by adding a bucket to our terraform code.
Open main.tf and add a resource:
resource "aws_s3_bucket" "crc_backend" {
  bucket = "this-bucket-will-be-deleted-asdflkajsdflasdgh"
}
Commit and push to main:
# Make sure you're on the main branch
git branch

# Check changes (just to confirm you haven't made any unexpected changes)
git status
# you could also run git diff to see the changes

# Add all changes
git add .

# commit the changes
git commit -m "Testing: adding a bucket that will be deleted later"

# push
git push
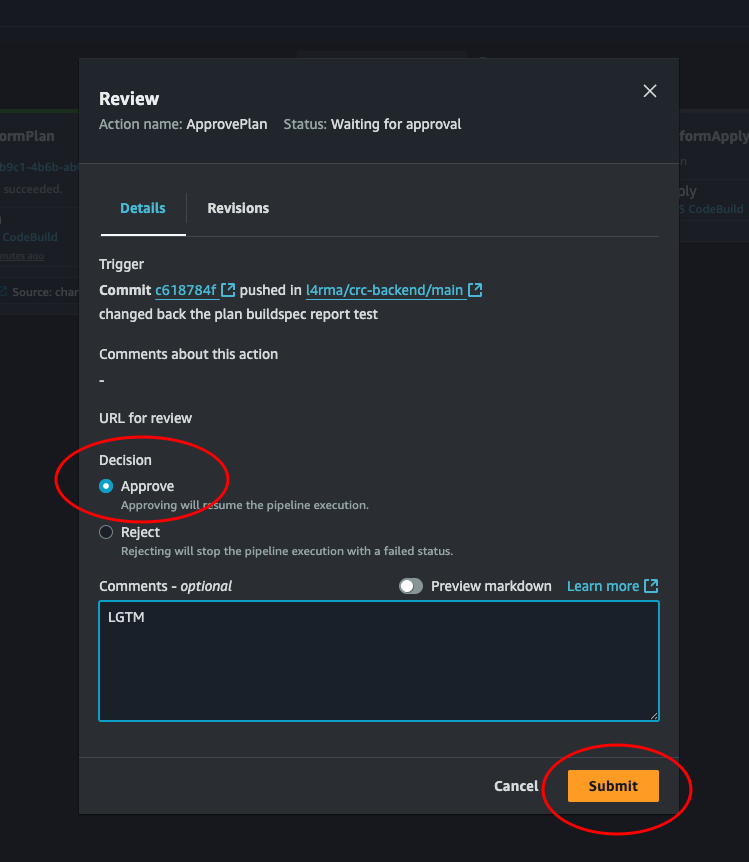
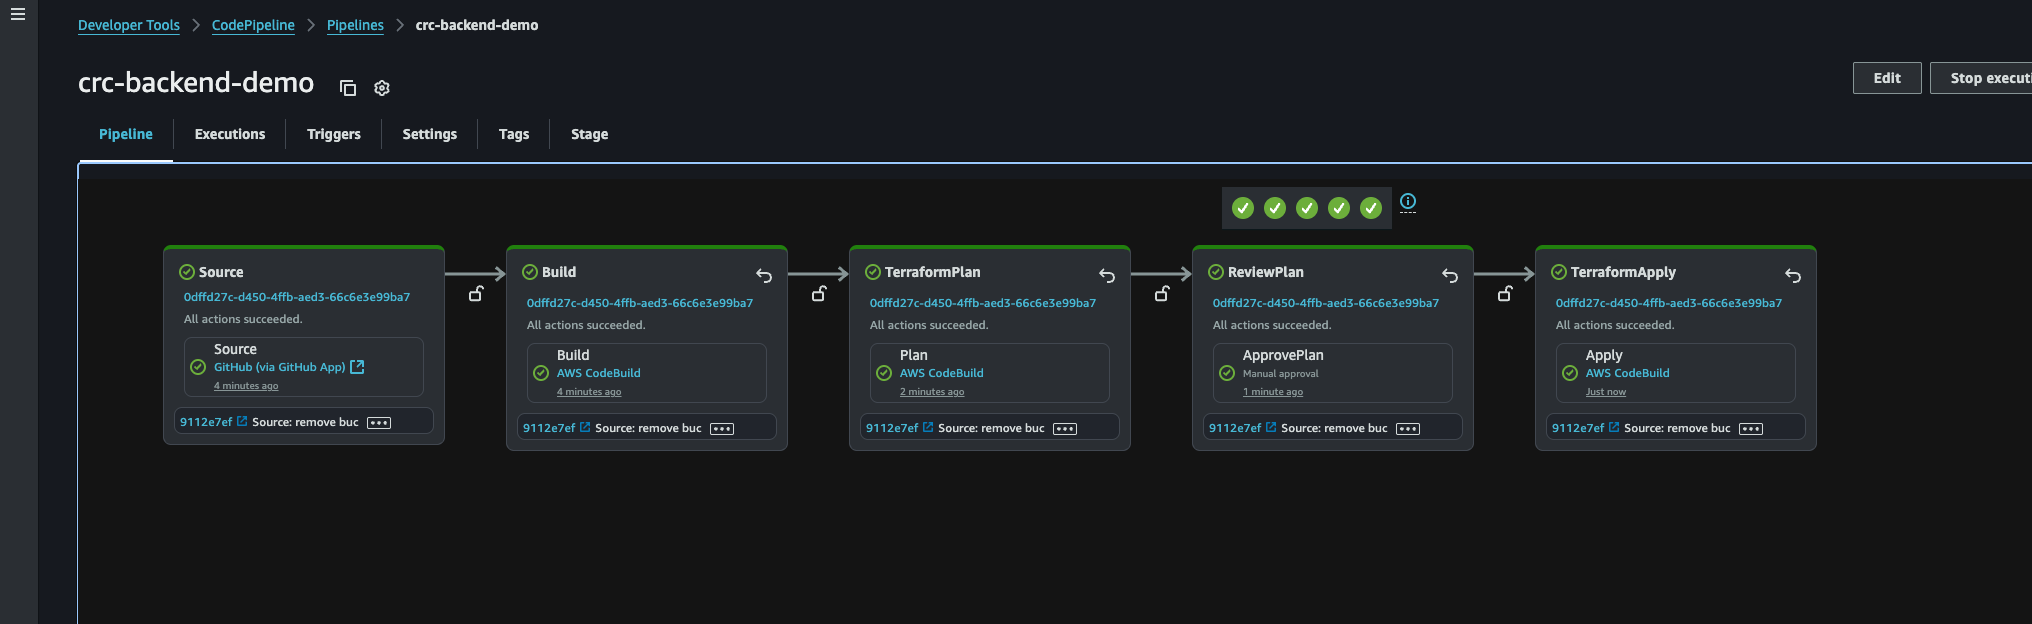
Back at our Pipeline console, let’s look at the progress. Everything looks good. And it stops at the ReviewPlan stage. Let’s click it.

Here we can see some details. There is a link to the commit that triggered the build. If we click it, we’re transported over to GitHub where we can see all the changes made to the files in the commit. Let’s review the changes, if we like what we see we can click approve, then submit.
And there we go. Everything is green. Our code has run and the resources has been successfully deployed by Terraform. Yay!
Now we must destroy the bucket we just created. And with our fully functional pipeline, it is as easy as just deleting the lines in main.tf and committing and pushing to main. So let’s do that, and then we can create a pipeline for our frontend as well.
Frontend pipeline
At the CodePipeline console, let’s create a new pipeline. This time for our frontend. Click Create pipeline.
-
Choose creation option: Choose Build custom pipeline and click next
-
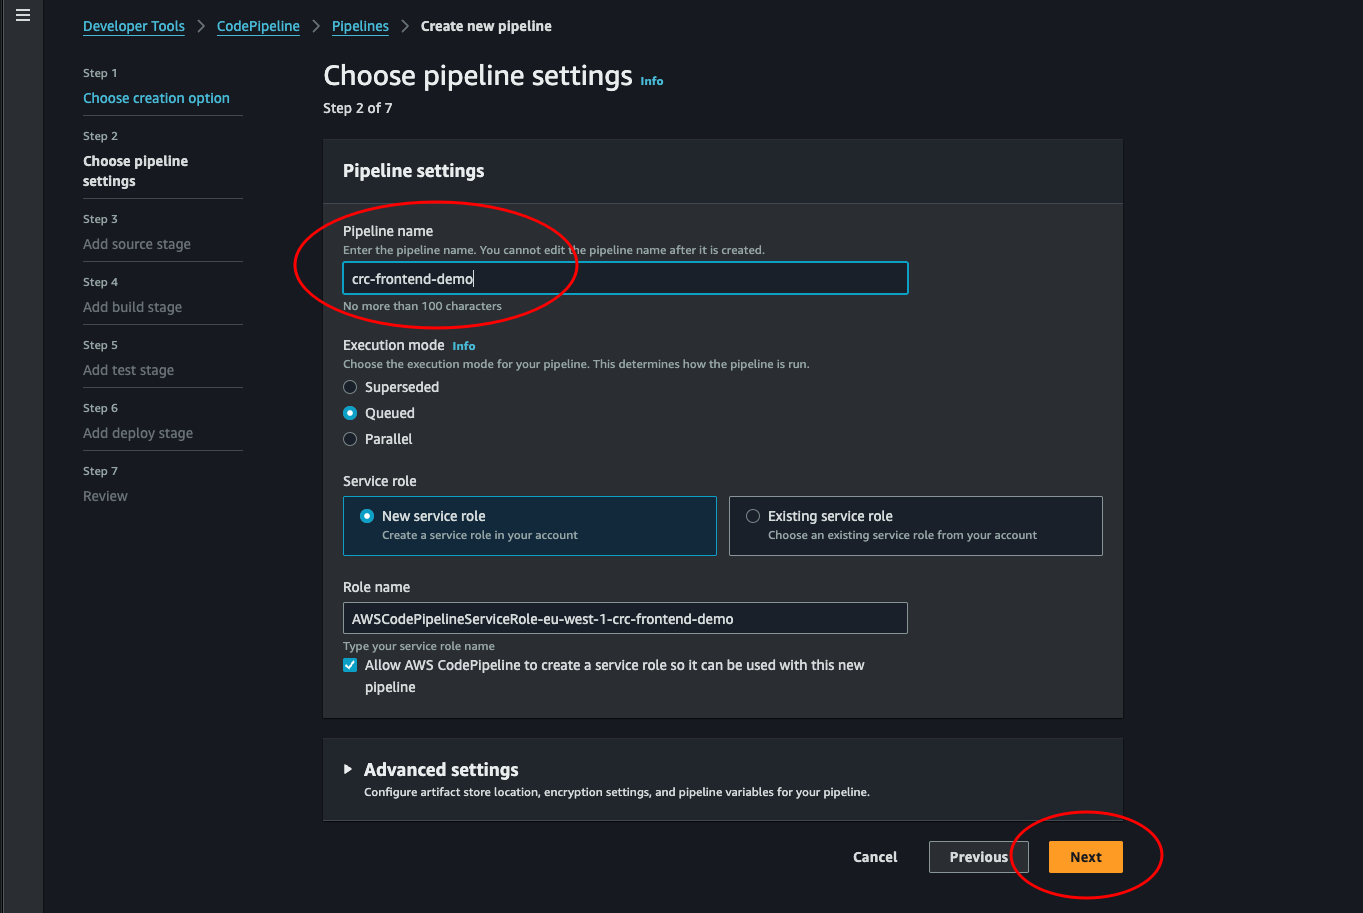
Choose pipeline settings: Give the pipeline a name and leave the rest. Click next.
-
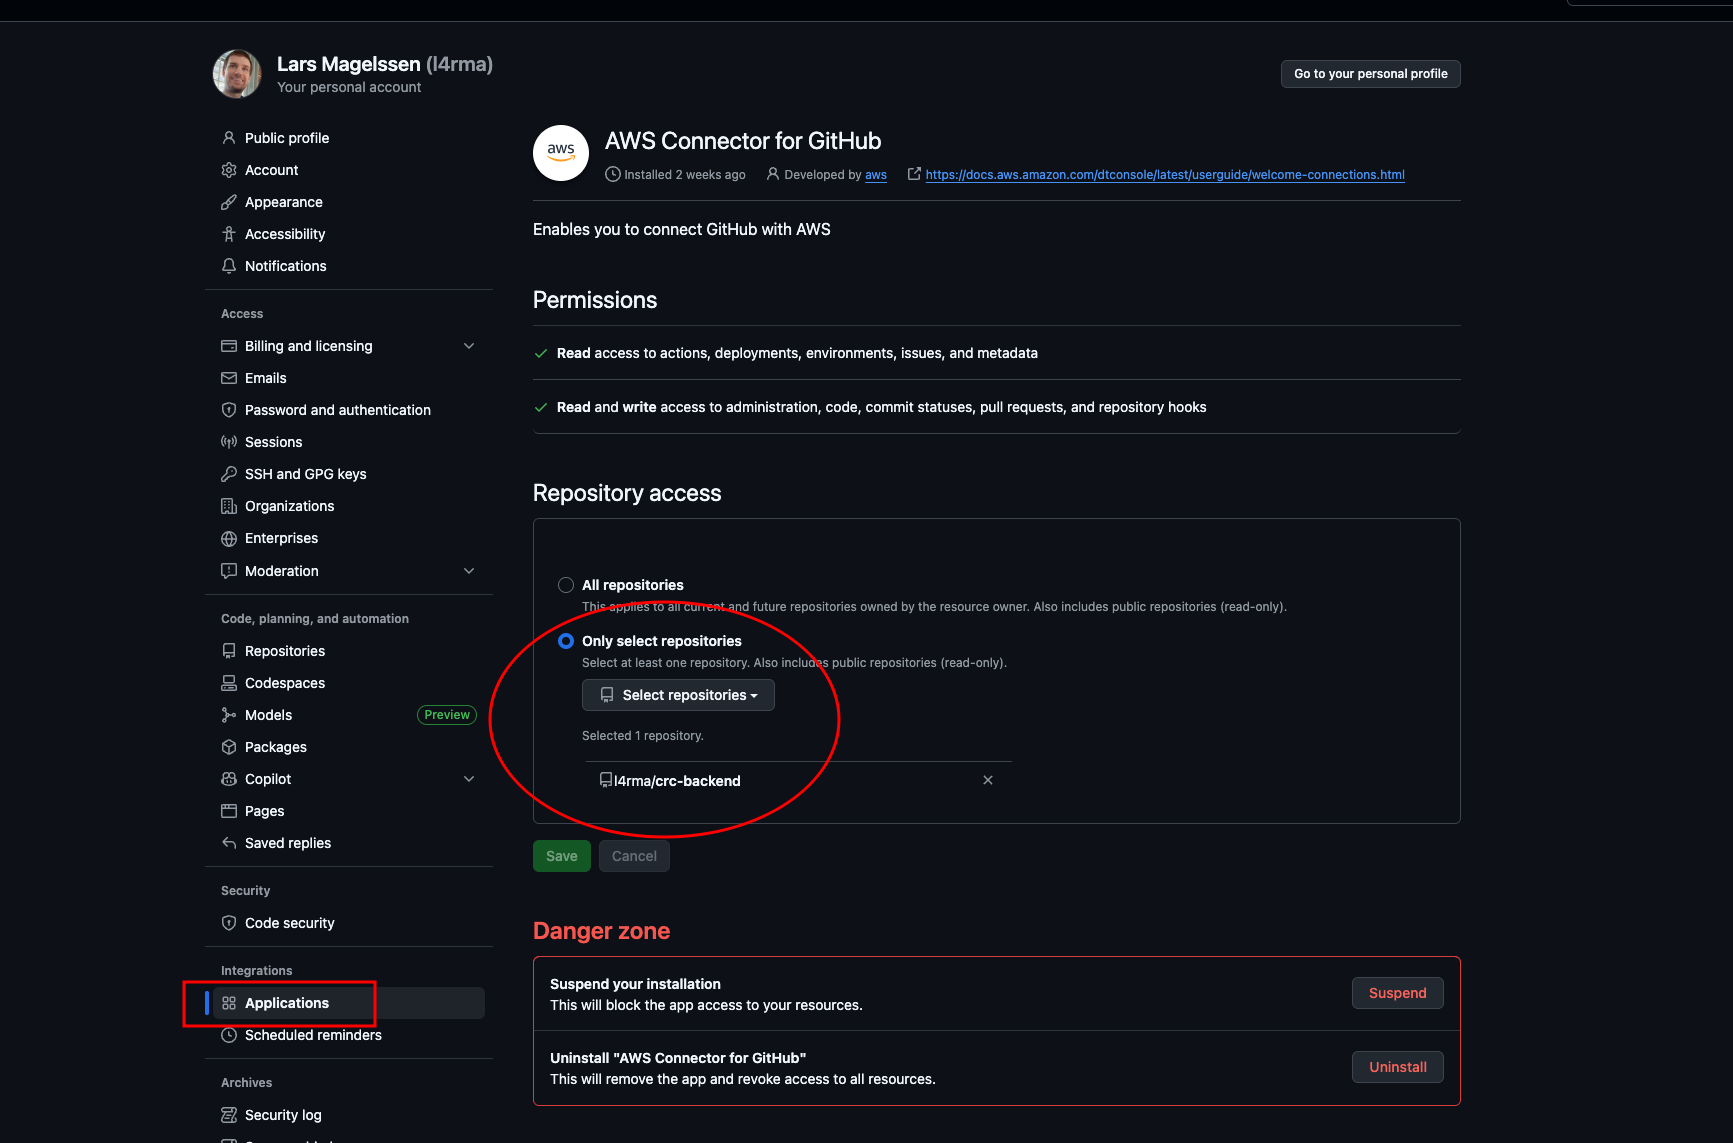
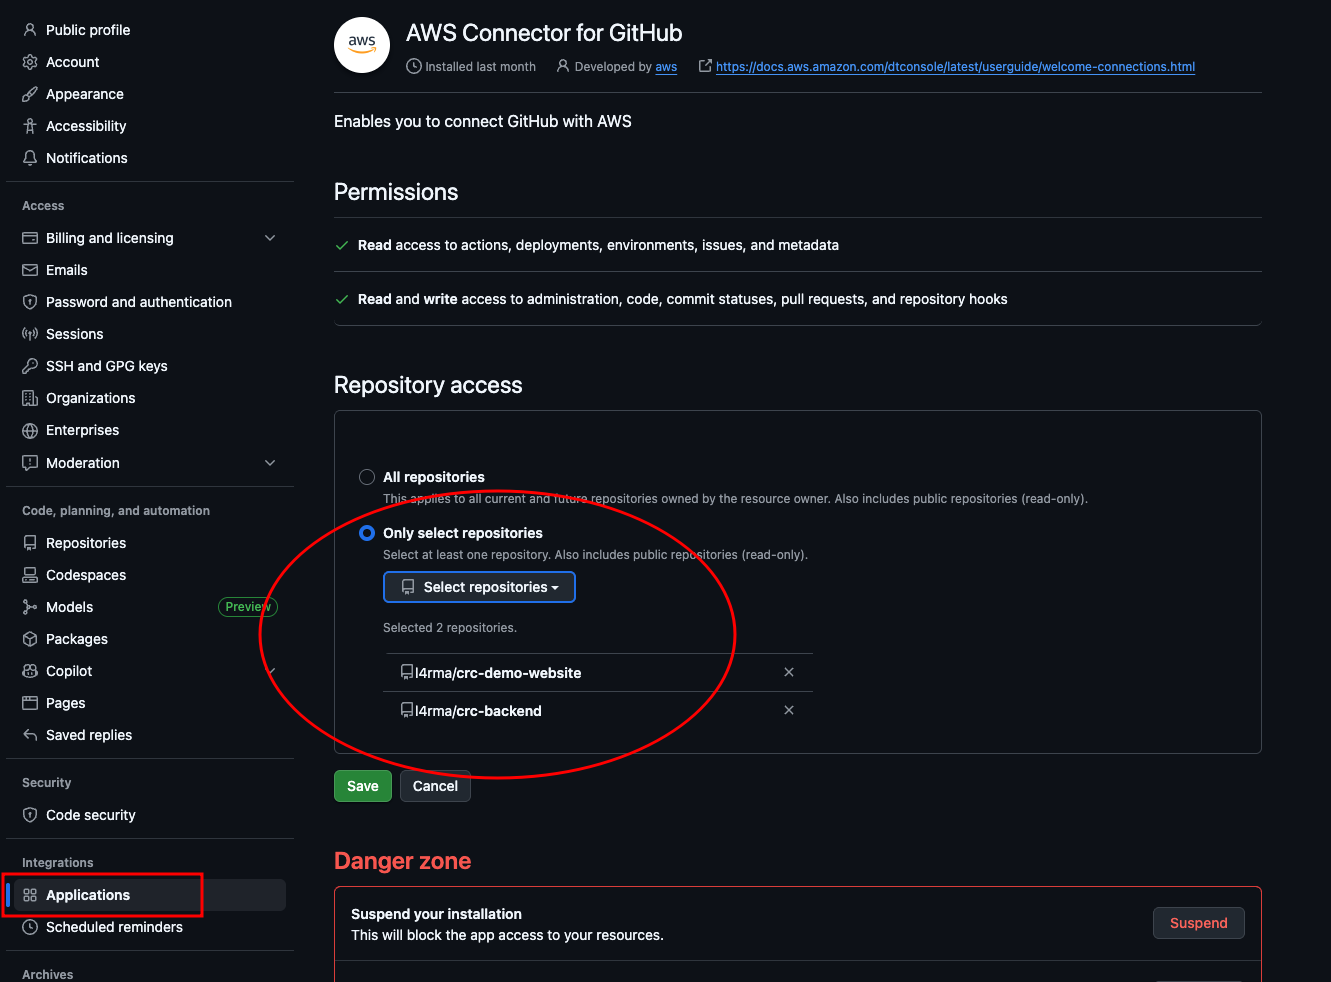
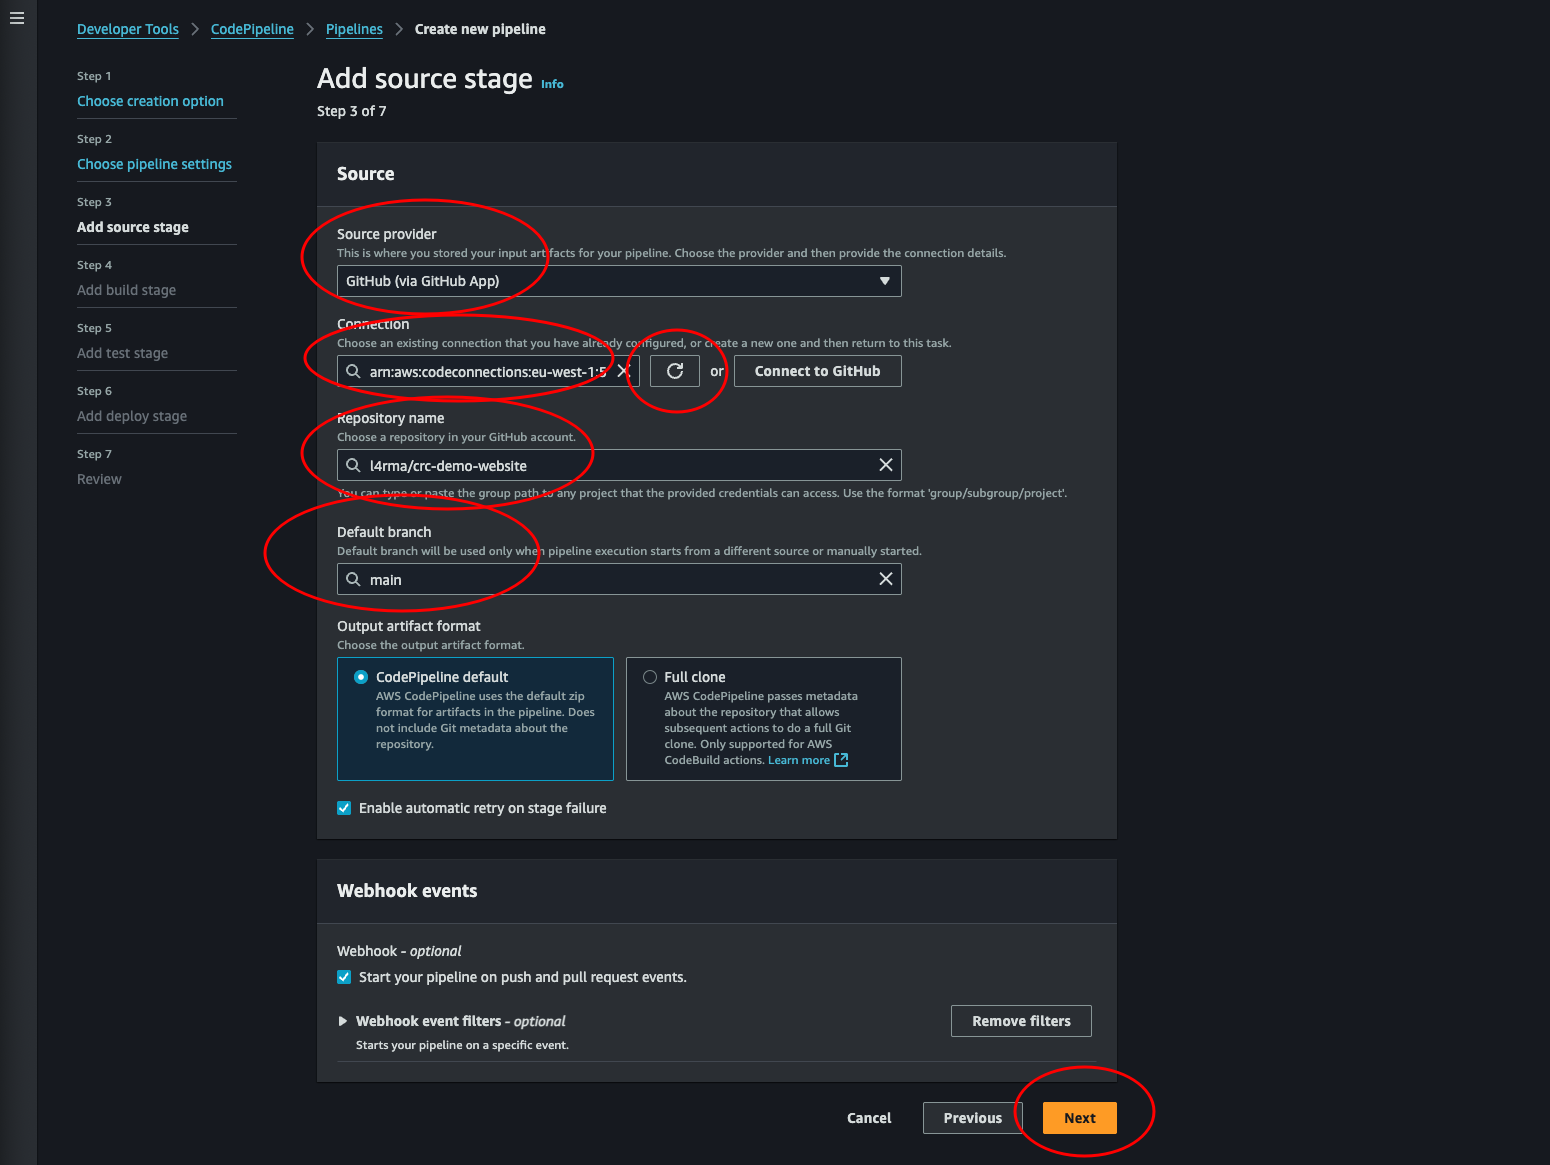
Add source stage: Select GitHub (via GitHub App), then select the connection we made when setting up the backend pipeline. If you did like me and only added one repository, we need to head over to github and add our frontend repo as well. Open a new browser tab and navigate over to github. Click the user icon in the top right corner and go to settings. Then, from the left hand side menu click Applications and select AWS Connector for GitHub. Here we can add our frontend repository and click save.
-
Now back at AWS Create new pipeline we can update the connection and find our frontend repository in the drop down menu. Select it and the default branch and click Next.
-
Skip the build stage and the test stage.
-
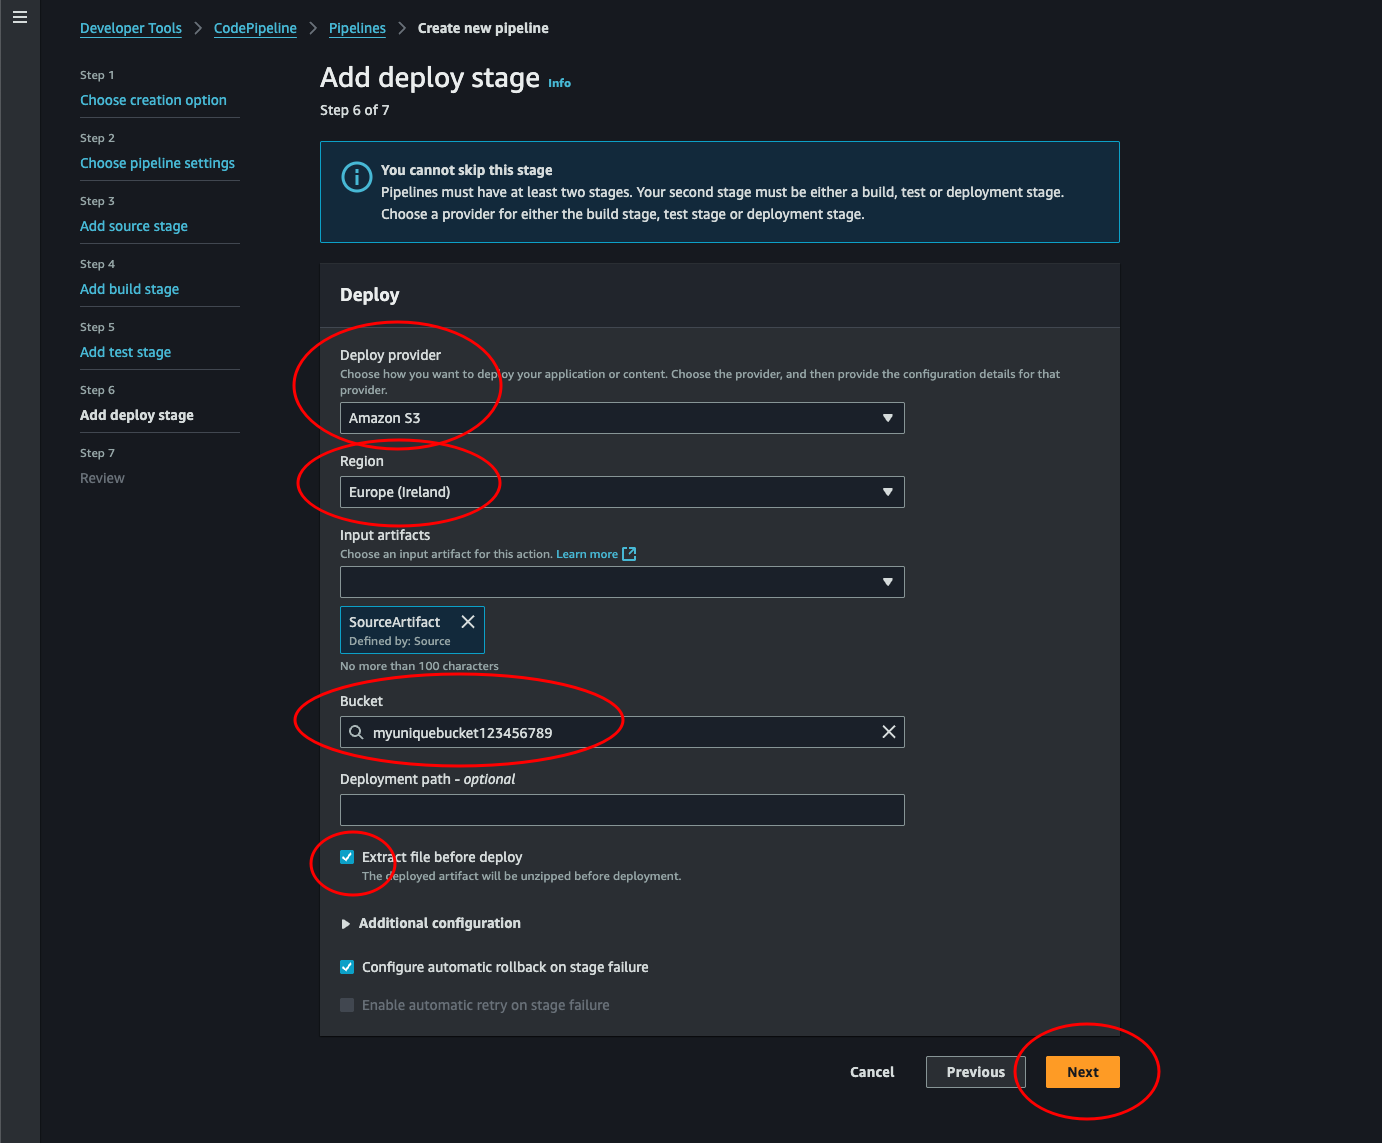
Add deploy stage: Here we select S3 as deploy provider. Select the region where our bucket with static hosting lives. Then select out bucket from the drop-down list and check the Extract file before deploy. Click Next.
-
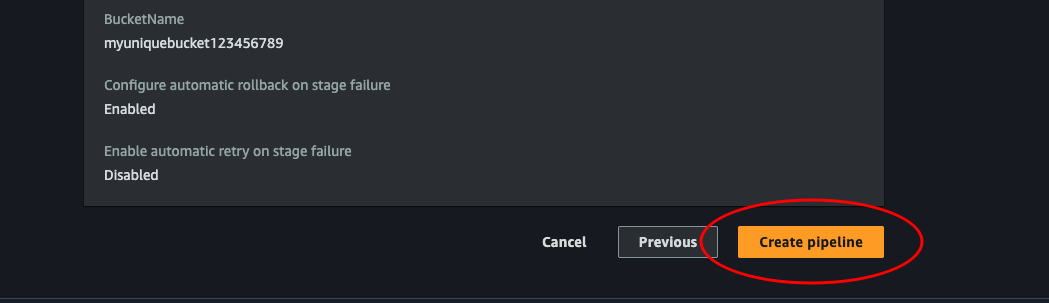
Review: Review our pipeline and click Create pipeline.
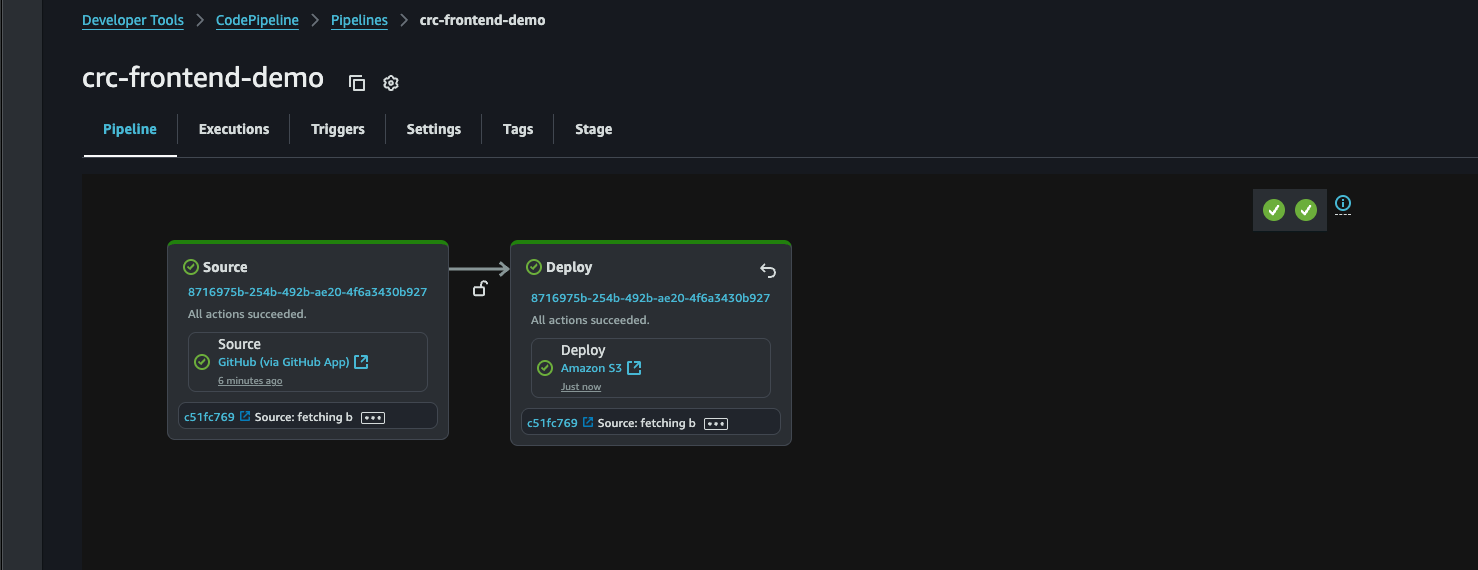
Success! That’s it, we’re done! Yay! Good job! If the pipeline didn’t run successfully, click it and read the error. A common error is that the bucket is located in a different region. Any time we want we can edit the pipeline and the stages and change region, or even the entire bucket.
Creating our first blog post
Ok, we should have everything we need now. Let’s make sure it works by adding something to our website. The Cloud Resume Challenge suggests adding a blog and writing a post about how you completed this whole challenge.
# Navigate over to our repo
cd crc-project-frontend

# Create a new branch
git checkout -b feature/blog

# Edit the HTML code
vim index.html

# Commit and push the changes
git commit -m "my first blog post"
git push

# Copy the correct command from the "error" and run it
git push --set-upstream origin ...
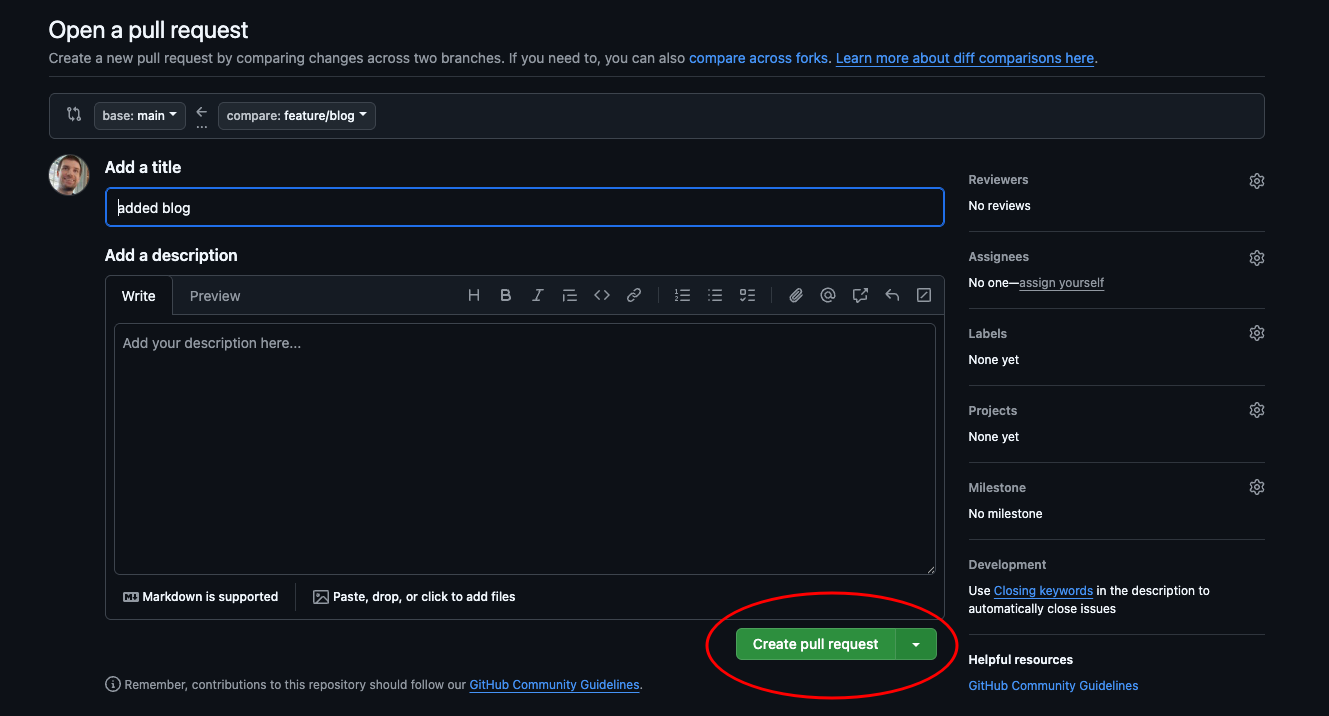
We just created a pull request. Navigate over to our frontend repository in GitHub and merge it by clicking the button.

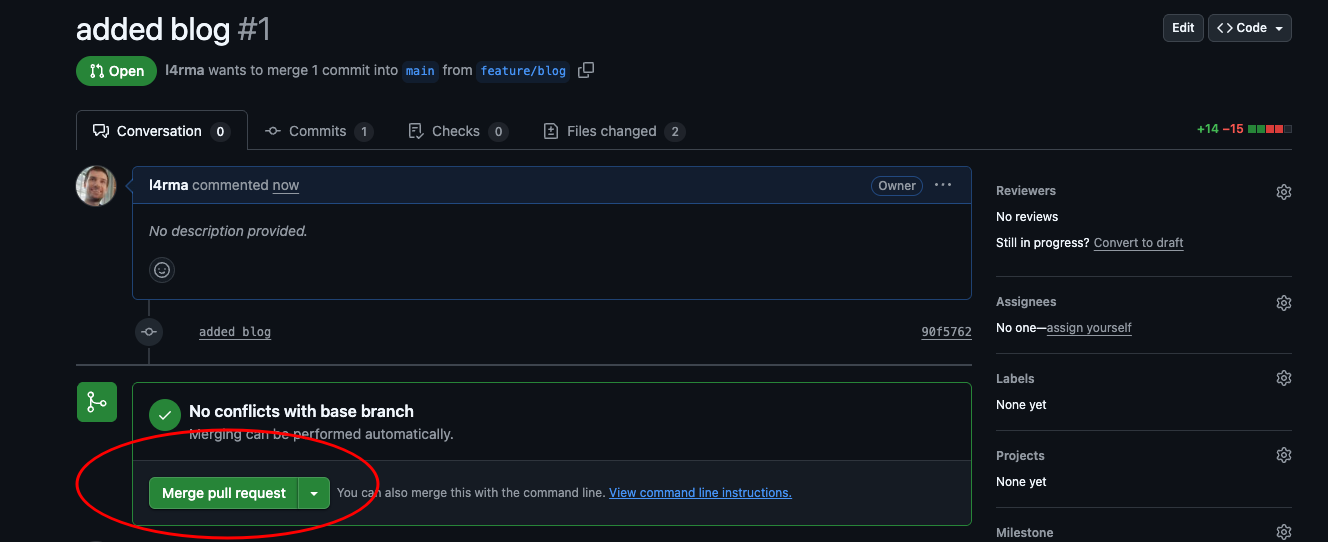
Now let’s log in to our AWS Console and navigate over to CodePipeline to see the magic in action.
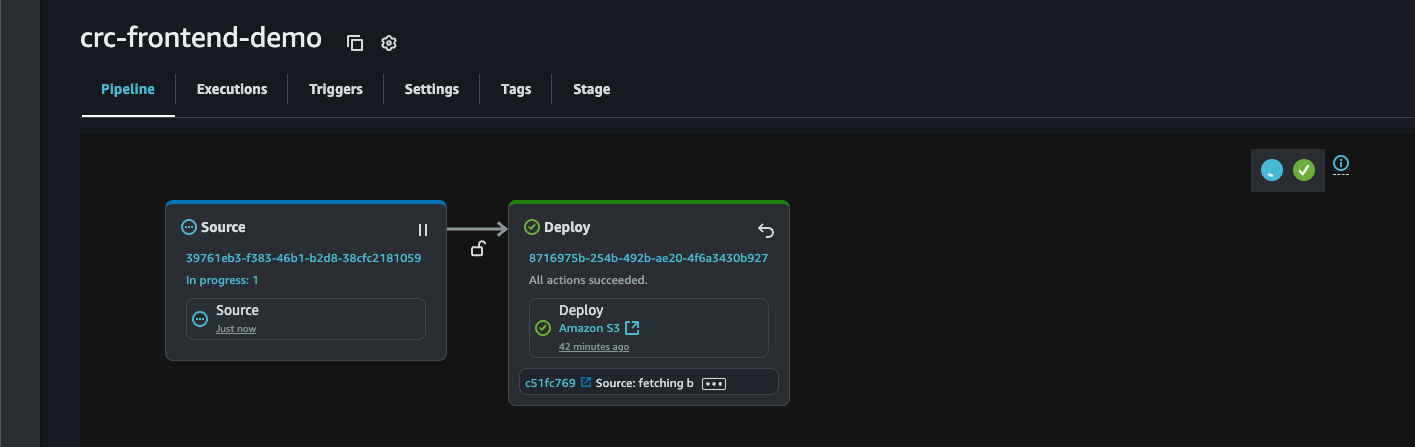
Looks good. Now to see the changes we once again need to invalidate the CloudFront cache. (Go back to Part 7-12: Backend - Creating a serverless API and requesting it with JS #Conclusion if you don’t remember how to do this)
Now we can open our webpage in the browser and see the updated versions that was deployed automatically with our CI/CD pipeline. Yay!
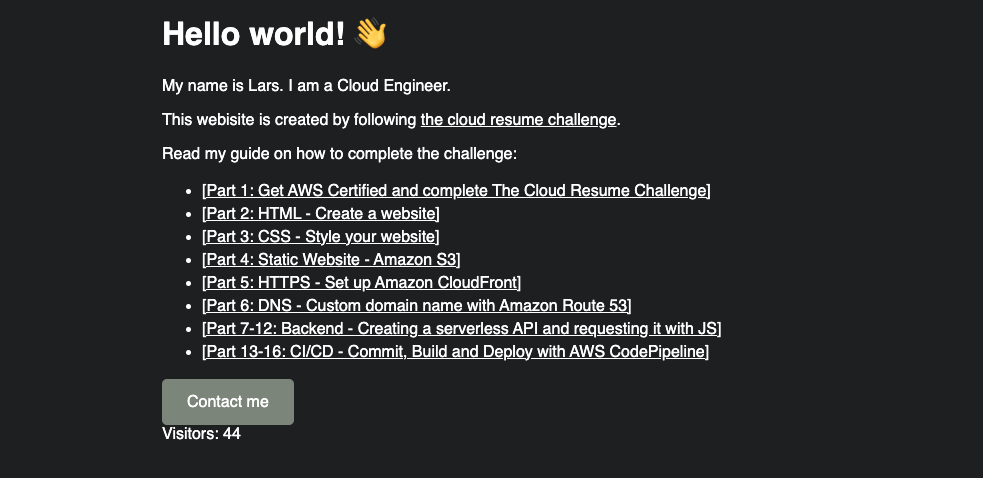
This marks the completion of my guide to the Cloud Resume Challenge. I would like to thank you a lot for reading my posts and congratulate you on creating your own website ready for further development.
If you have any feedback to me about this guide or if you want to show me your website (I would love to see it) send me an e-mail contact@magelssen.io